
When we first plugged in the Breville Bambino Plus, our reaction was pretty much: there’s no way something this small and this cheap can pull a shot this good. Which is why we test espresso machines – to separate what’s just hype or a fluke from what’s actually good.
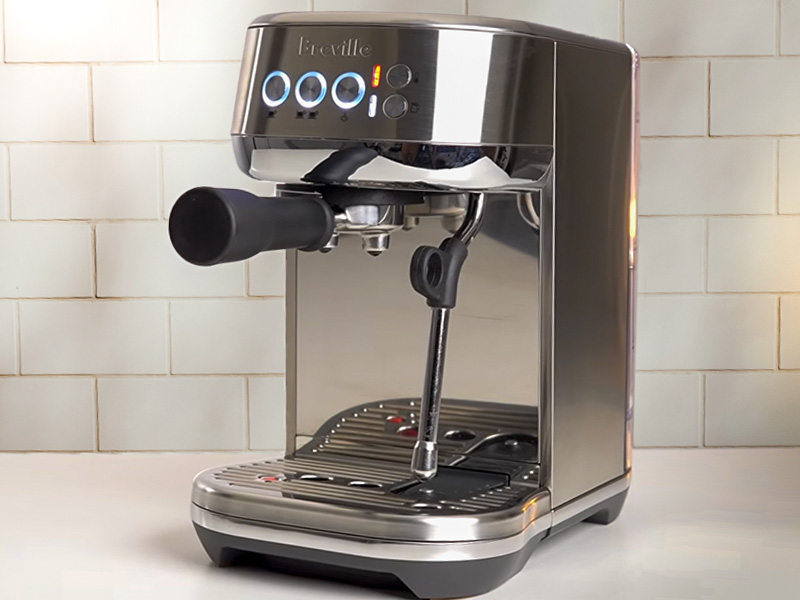
We point most beginner to mid-level home baristas towards the Bambino Plus. Especially if you want genuinely good espresso and cafe-style milk drinks without a steep learning curve or a huge countertop commitment. But the Bambino Plus isn’t for you if you prefer drinking light roasts or you want full manual control over every variable.
The weeks we spent using and testing this machine for our Breville Bambino Plus review were eye-opening in terms of how good it actually is for the money. Sure, there are a few annoyances and some limitations that come with living with any espresso machine. You’ll find all the details, nuances, and caveats in this review:
This article may contain affiliate/ compensated links. As an Amazon Associate, we earn from qualifying purchases at no additional cost to you. For more information please see our disclaimer here.

At a Glance: Breville Bambino Plus Review
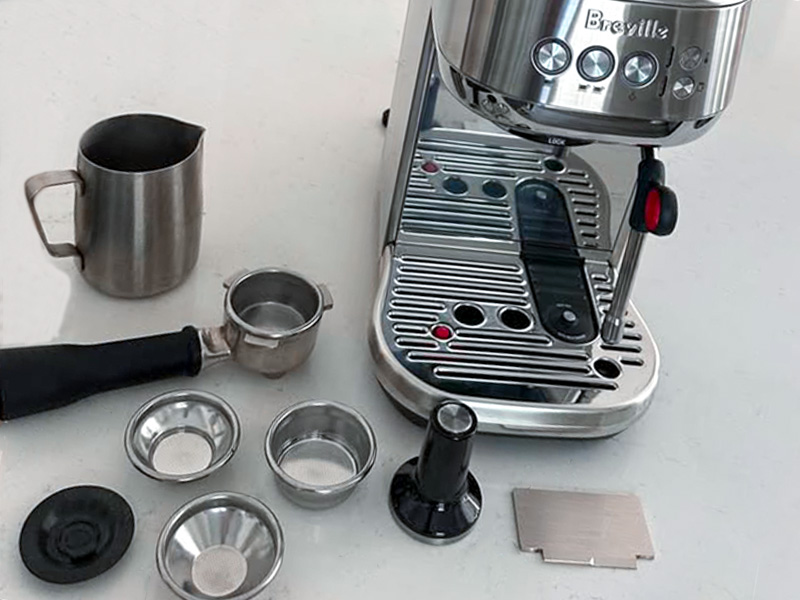
Verdict: The Bambino Plus takes the guts of Breville’s bigger machines (the ThermoJet heater, the PID, low-pressure pre-infusion, a 9 bar OPV) and squeezes them into something the size of a large toaster.
Automated milk frothing pushes this machine fully into the “beginner-friendly” bracket. Then the option to use unpressurized baskets allows more confident users to really get their teeth into pulling higher-quality espresso shots. Though you’ll need to invest in some accessories if you’re looking to really get into it.
We got the best results from a medium-dark roast espresso blend – rich, full-bodied espresso with good depth, including fruit and nut notes. We’ve tried a lot of machines at this price ($500), and few are capable of pulling this level of flavor from the beans.
Bottom line: If you want great espresso and properly good milk drinks with minimal fuss, and you’re willing to stick to medium or darker roasts, the Bambino Plus is really hard to beat for the money.

Pros
- Capable of pulling amazing espresso
- Automated milk foam is excellent (plus the option to go manual)
- PID temperature control for consistency
- Compatible with lots of accessories to elevate your brewing
- Dedicated hot water button
- Good for beginners or experts
- Small footprint

Cons
- Fixed brewing temperature
- Small drip tray needs dailing emptying
- Steam wand doesn’t swivel to the side
- Needs a good grinder for best results
- So lightweight that it can be awkward to use

 Prefer to shop direct?
Who It’s For (And Who It’s Not!)
✅ Buy the Breville Bambino Plus if:
- You want espresso and milk drinks as good as those in cafes. With good beans, a good grinder, and a little practice you can completely replace your cafe habit without having to sacrifice quality.
- You’re working with medium to dark roasts most of the time. If light roast beans aren’t your style, then you’ll love the Bambino Plus. Anything medium roast or darker works wonderfully with this machine.
- Countertop space is tight. The Bambino Plus has a very small footprint – 7.4″ wide and 11.9″ deep.
- You want a machine you can grow into. Keep things simple in the beginning with pressurized baskets and automated milk. Move on to unpressurized baskets and manual foaming. Then dive into the world of bottomless portafilters and professional baskets when you’re ready. The Bambino Plus can be there for the whole journey.
❌ Skip it if:
- You drink light roasts. It’s really hard to get great espresso from light roasts with the Bambino Plus – not impossible, but not worth the effort.
- You want manual control over the brew temperature. You can do some things to try to change it by a couple of degrees, but if you want actual control of the brewing temperature, look elsewhere.
- You’re looking to fall down the espresso rabbit hole. The Bambino Plus will follow most people throughout their whole espresso journey, but if you plan to dive seriously deep into the nerdy espresso-brewing waters, there are better machines to do that with.

Key Features
1. ThermoJet Heating (3 second warm-up)
Instead of waiting for a boiler to heat up, the ThermoJet element gets you up to the brew temperature in about 3 seconds. In practice, this means you’re not standing around waiting, and it also means the machine can drop from steam temperature for milk back to brew temperature for espresso fast enough that your workflow barely slows down between drinks.
2. PID Temperature Control (fixed at 200°F)
A PID keeps the brew temperature stable shot after shot, which is the single biggest reason this machine outperforms other options at the price.
The downside is that it’s fixed at 93°C with no way to adjust it. That’s a solid, safe temperature for medium to dark roasts. But if you’re using lighter, more acidic beans, you’ll likely need to compensate with a finer grind or a longer ratio since there’s no option to dial back the heat. Even then, the results are unlikely to blow you away.
3. Low Pressure Pre-Infusion
Pre-infusion wets the coffee puck gently before full pressure kicks in, and it’s one of the best ways to avoid channeling (the uneven extraction that ruins a shot). It also allows the trapped CO2 in the grounds to escape, making flavor extraction easier.
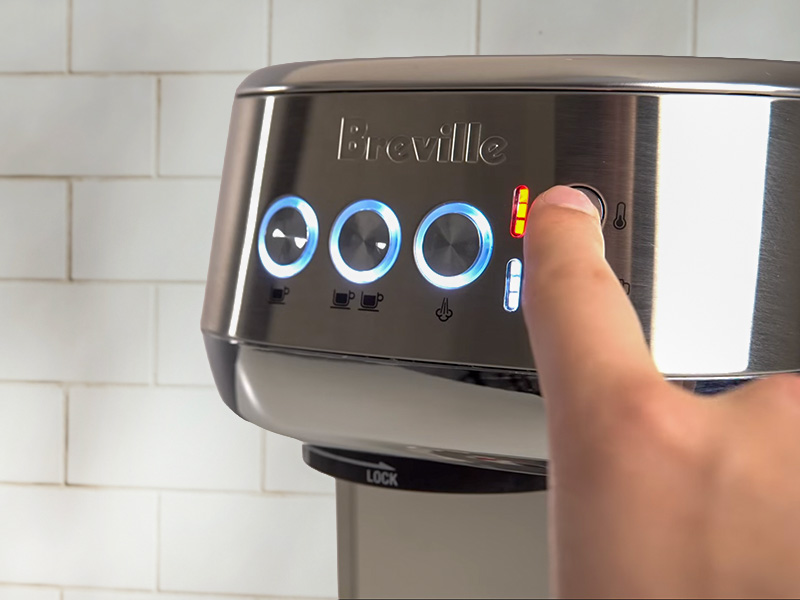
It’s factory-preset on the volumetric buttons. But if you pull shots manually, you can customize pre-infusion from 0 to 10 seconds just by holding down the 1 or 2-cup button for however long you’d like. These buttons are both programmable for shot length too, so once you’ve dialled in your espresso, you can save it and repeat on demand.
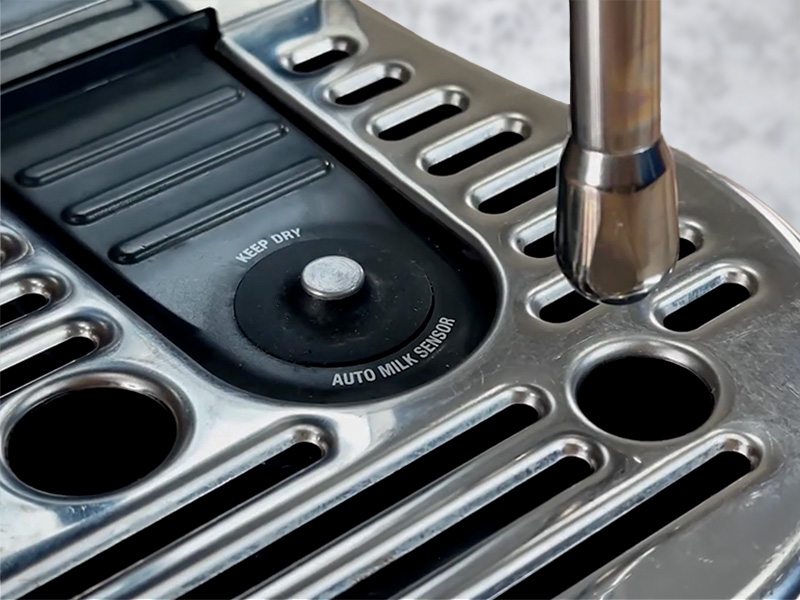
4. Automatic Milk Frothing
Pop the jug on the sensor, hit the steam button, and the Bambino Plus handles the rest. Texture and temperature are both adjustable across three settings each. It’s not flawless (results can vary slightly shot to shot) but it’s a very useful feature for anyone who doesn’t want to learn manual steaming from scratch.
The 4-hole steam tip is powerful enough that, with a bit of practice, you can get close to pro-level microfoam manually too if that’s the route you’d rather take.
5. Razor Tool
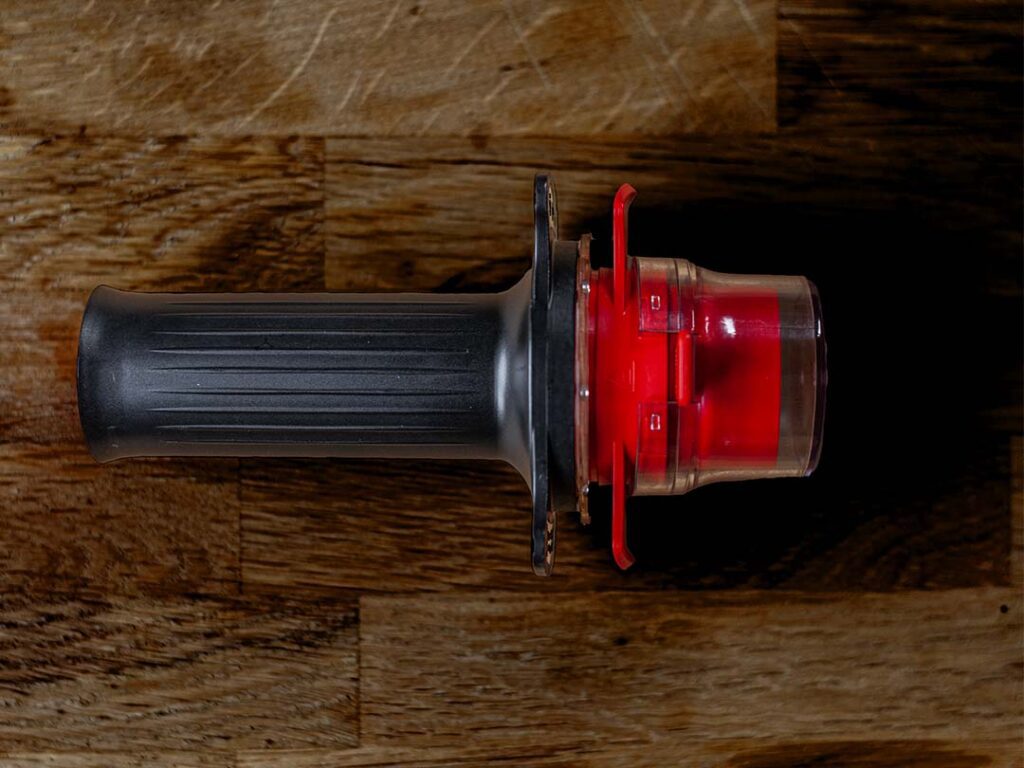
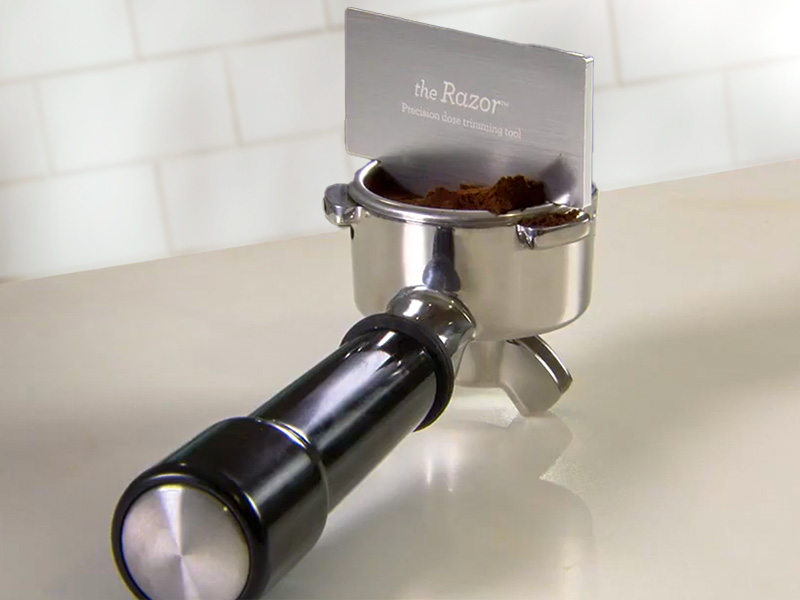
The Razor tool that comes in the box is a small but handy inclusion: it helps with puck prep by leveling off your dose to the correct volume, not just weight. This takes away a lot of the guesswork, helping you become more consistent right from the beginning.
Having said that, once dosing and tamping become second nature, you’ll probably not use it.
6. 54mm Portafilter and Dual-Wall Baskets
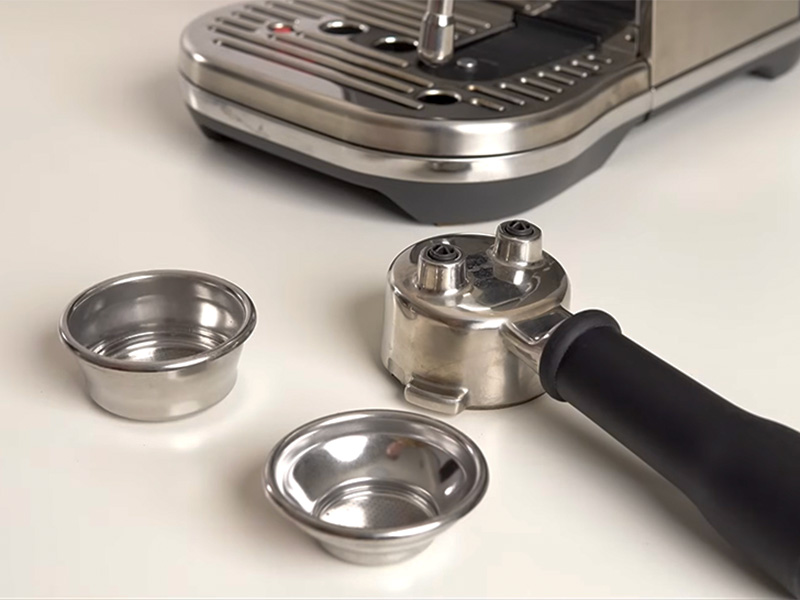
The Bambino Plus includes both pressurized (dual-wall) and unpressurized (single-wall) baskets. The pressurized ones are there for beginners or for using pre-ground or not-quite-fresh coffee, as they’ll get you a reasonable shot with very little effort. But certainly not the very best quality that this machine is capable of.
Once you’re working with freshly roasted beans, an espresso grinder, and have a little more experience under your belt, switch to the unpressurized basket. You’ll need to be more precise with your puck prep, but the flavor quality is a huge step up. This is the basket all our tests were run on.
7. Hot Water Function (sort of)
There’s no dedicated hot water button, which is a strange omission for a Breville machine, but it’s not a dealbreaker as there’s a workaround. If you pull the steam wand out and press and hold both the one-cup and froth setting buttons, hot water flows. We mostly use this for making an Americano, but you could also use it for a cup of tea.

Is the Breville Bambino Plus easy to use?
The Breville Bambino Plus eases you in to making cafe drinks at home. There’s a bit of learning, but not enough to feel overwhelming.
Starting out: Use the pressurized baskets with pre-ground coffee, factory settings, and automatic milk to make decent coffee with little to no effort. The only choice is whether to make a single or double shot.
Middle level: Progress to grinding your own beans and weighing out shots to get the best flavor from your beans. Then master manual milk frothing. You can switch to the unpressurized baskets for better flavor, but more variables for you to control.
Feeling confident: Finally, you can dive into pro baskets, bottomless portafilters, WDT tools, puck screens, shower screens, and a whole world of extra accessories to truly master this little espresso machine.
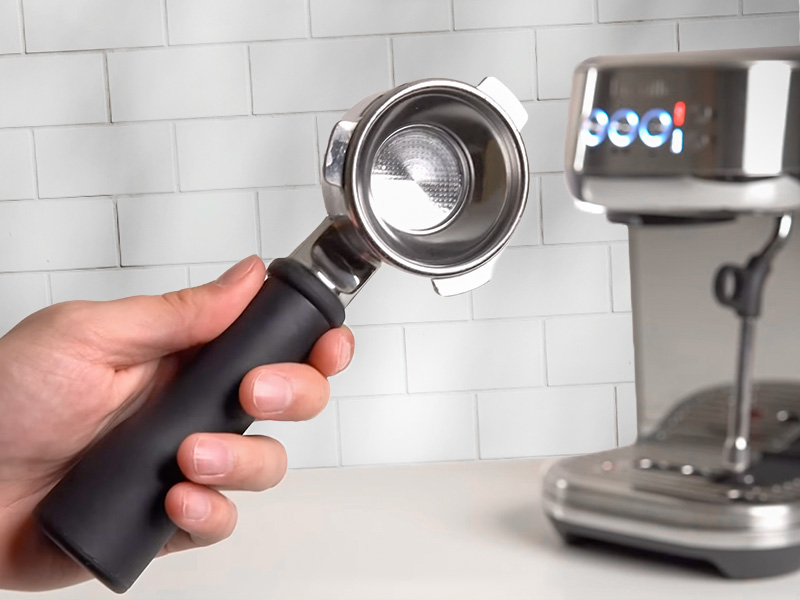
At each stage, it becomes a little more complex – more things can go wrong, and you need to be more consistent. But you can also stop whenever you hit your ceiling and still be happy with the results.
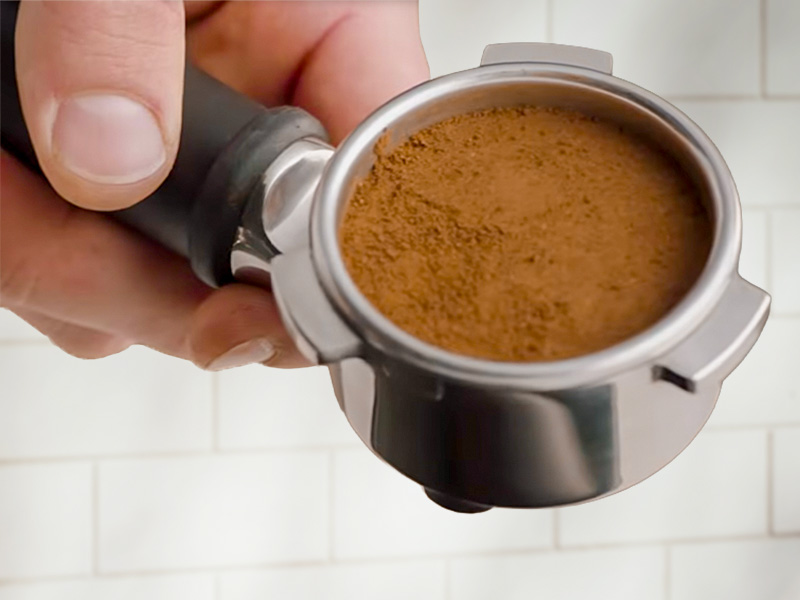
Puck prep is always down to you, though, which is an easy place to go wrong.
Using the pressurized baskets will remove most errors here, and the razor adjustment tool ensures you haven’t overfilled the basket. But if you’re opting for the unpressurized baskets (better-tasting coffee, once you’ve mastered it), using a good-quality espresso grinder and coffee scale is non-negotiable. Probably an upgraded tamper and a WDT tool too. None of this is expensive, other than the grinder, and they pay for themselves 100x over, considering how much easier they make puck prep. And how much better your coffee will taste as a result.
These are our go-to tools:
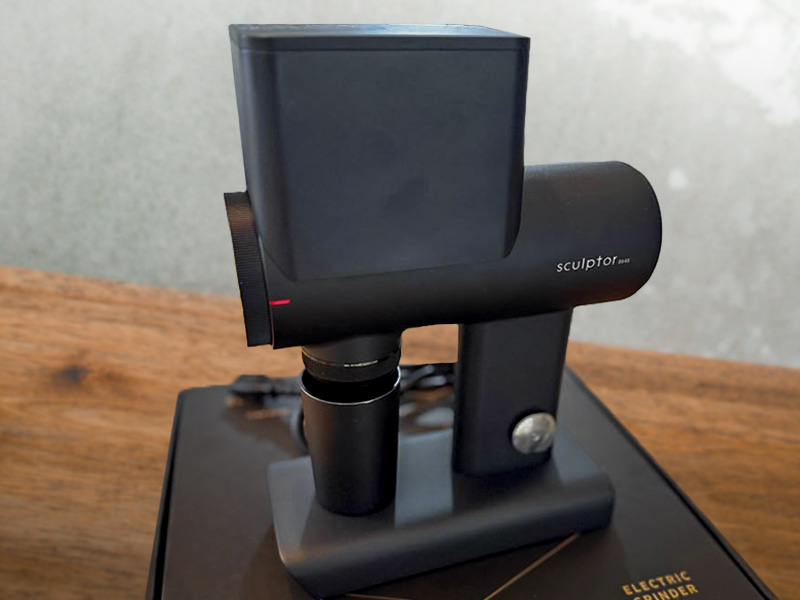
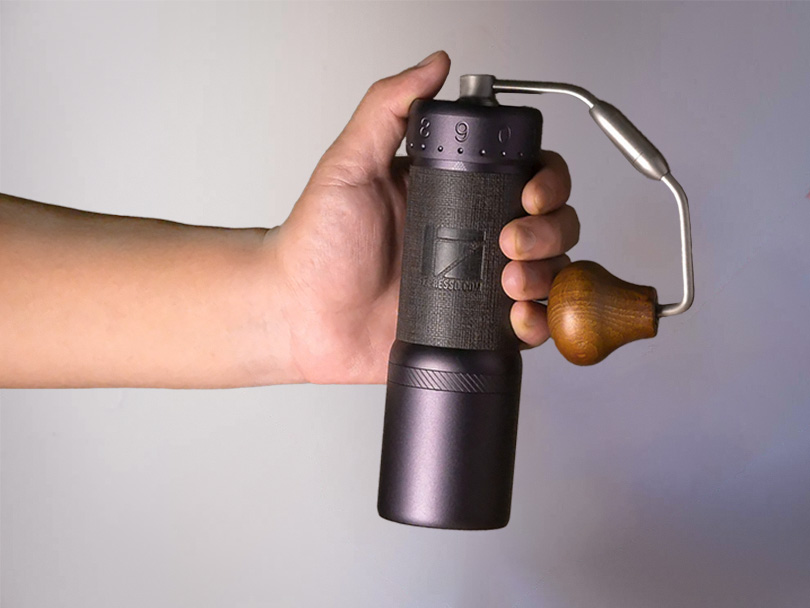
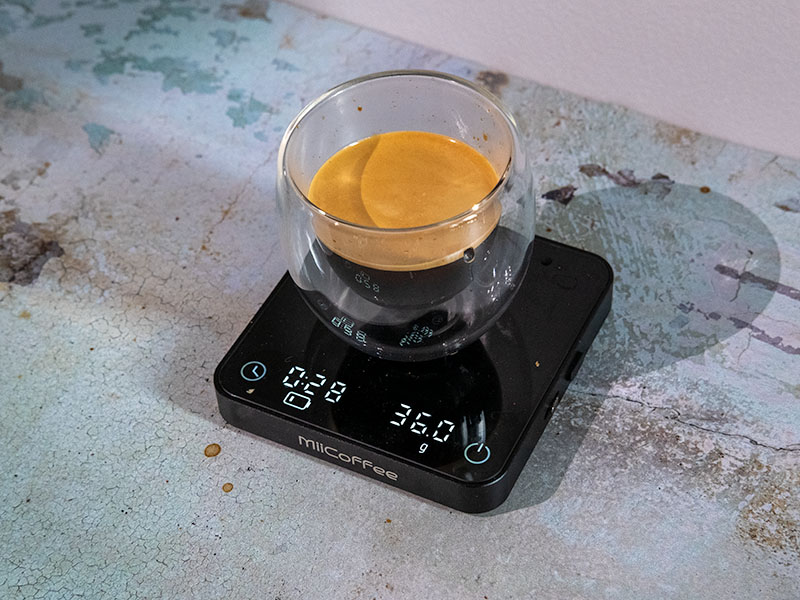

How good is the Espresso?
The espresso is good enough to keep the low-level coffee nerds happy.
Once you nail your workflow (be patient whilst you get there), you can pull impressive shots. Paired with our 1Zpresso J-Ultra grinder, we consistently got rich, full-bodied espresso. Our shots had great depth – we could taste the subtle fruit notes from the beans alongside the more classic chocolate and nut flavors we’d expect from our medium-dark roast espresso blend.
With espresso machines at this price point, we usually find that the shots are good, but they’re missing that extra layer of complexity. The Bambino Plus really shines here – when paired with the right beans and accessories, the shots feel three-dimensional.
We pulled our best shots when using the non-pressurized baskets and a 50ml shot volume. Sure, you can get decent espresso with the pressurized baskets and factory settings if you want to keep things simple; it just doesn’t come close to what the Bambino Plus is capable of.
Being able to cater to everyone’s level of effort and desired output is one of the main selling points of the Bambino Plus:
If you’re looking to chuck pre-ground coffee into a portafilter and get a shot in under 1 minute, it can do that for you. If you want to really tease out all the nuanced fruit flavors from a medium-roast single-origin, it can do that too.
The consistency is also very impressive. The PID keeps the water temperature constant, and the OPV ensures the basket pressure is pretty constant too. If you’re seeing big deviations in your shots, it’s most likely due to inconsistency in your puck prep.
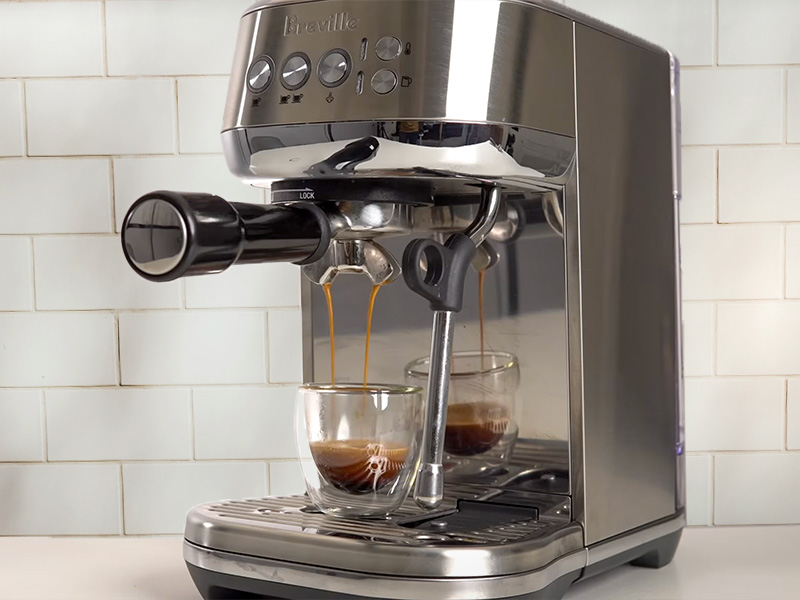
Our Breville Bambino Plus Settings
We like the feeling of a manual grinder so we opt for the 1Zpresso J-Ultra for espresso:

- Grind setting 1.3.6 on the J Ultra
- Double unpressurized basket with a 17g dose
- 5 seconds pre-infusion
- 50ml volume
- From there, we were consistently hitting 35g of espresso in 28 seconds
This was using medium-dark roast espresso blend beans.
It took us 10 shots to get one we really liked that balanced the flavors nicely and retained the subtle fruit notes we were looking for. Then another 3 before we got our workflow consistent enough for it to be right basically every time. Taking this amount of time to dial in is pretty normal, so be kind to yourself (and the Bambino Plus) when you’re working things out.
Like its little brother, both the Bambino and Bambino Plus benefit from running an empty cycle first to heat the portafilter and brewhead. So even though the machine is ready in around 3 seconds, for best results, it’ll take around 45 to 60 seconds. Still impressive.
If you want to make your shots even better, you’ll need to invest in a really good specialist espresso grinder – the Timemore Sculptor 064s is our current top recommendation, though it does cost more than the Bambino Plus! This will make a much bigger difference than upgrading to a more expensive machine.

How good is the Milk Wand?
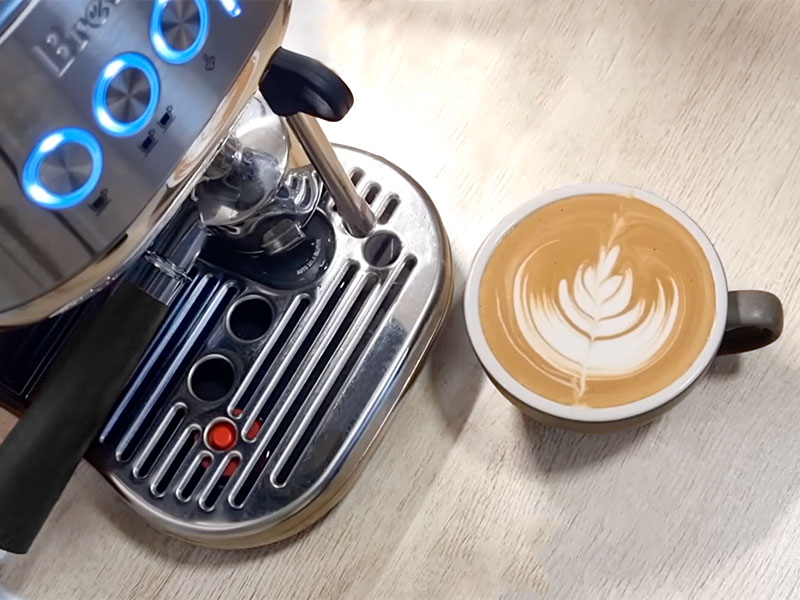
The automated milk is very good, but the wand itself is even better in manual mode (with practice)
You get 3 temperature settings and 3 foam settings to choose from. It goes from sort of flat white to an old-school cappuccino or latte macchiato in terms of what you actually get.
The auto milk frother works well enough for anyone looking for minimum-fuss coffee – you’ll easily get a very serviceable flat white, latte, or cappuccino.
Similar to the espresso, the real magic is in what’s possible if you decide to do some work yourself. The steam wand is extremely powerful, with super-hot steam (good for getting the best milk texture). You can get an ideal texture for your preferred milky espresso drink in around 45 seconds.
The 4-hole design makes this speed and quality possible, but also makes learning a little bit harder. (For context, the Bambino only has a restrictive single hole wand.) If you’ve never steamed milk before, it shouldn’t take more than a couple of weeks of practice. Unlike messing up espresso shots, at least poorly formed microfoam is still drinkable!

Should you use Pre-Ground Coffee or whole beans?
Whole beans, without question. Whilst we would always recommend this, the Bambino Plus really relies on this advice.
The Bambino Plus is designed around using whole beans and a separate grinder, not pre-ground coffee. Although the pressurized baskets will work with either, the quality drop-off is stark.
If you’re serious about getting good espresso out of this machine, you’ll want fresh whole beans and a decent grinder capable of a proper espresso grind range. (Unfortunately, most budget grinders don’t handle espresso grind well.)
Stick to medium or dark roasts for the best results given the fixed 93°C brew temperature. Light roasts aren’t off the table entirely, but you’ll be fighting the machine a bit more to get there.
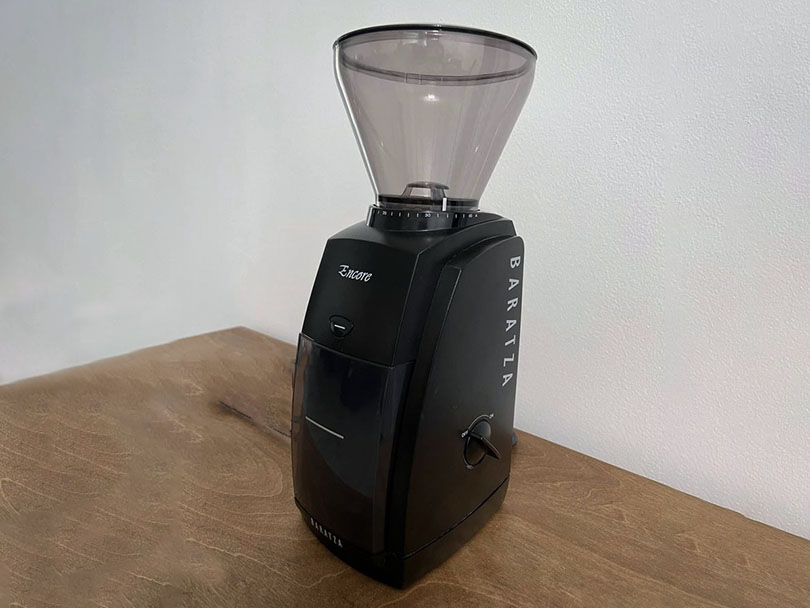
Grinder Recommendations
The first two come in around the $200 mark, with the last one being the best (by far) but also significantly more expensive:
Design and Build Quality Review
The Looks
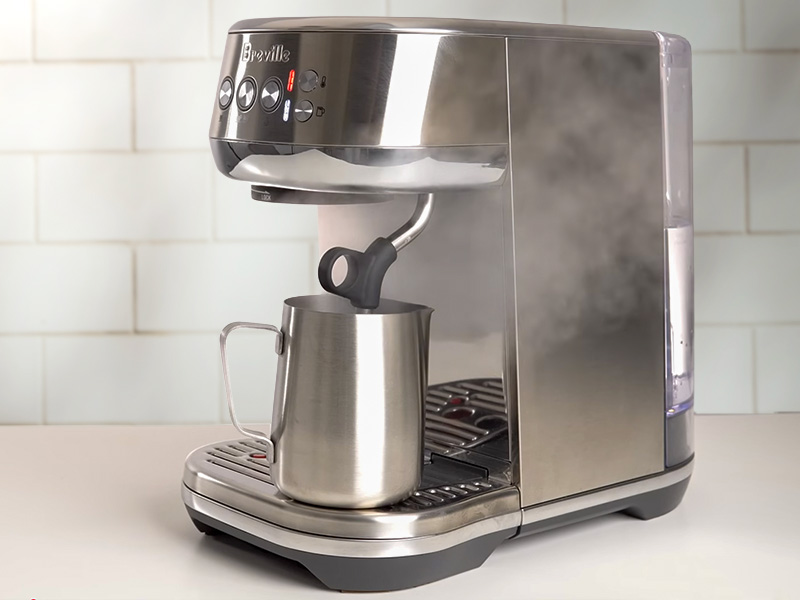
The Bambino Plus is a handsome little machine (is that weird to say…?) It’s compact, a mix of stainless steel and plastic, and it comes in a few finishes depending on your home’s vibe (brushed stainless steel like ours, black truffle, olive, or damson blue). So it doesn’t look out of place on a modern countertop. Shopping direct usually opens up some extra color options and limited releases.
At 7.4″ wide and 11.9″ deep, even those tight on space should be able to fit it in comfortably.
Some people may bemoan the use of any plastic in the design, and we don’t disagree. But we’re resigned to this just being a fact of life for any espresso machine these days. It certainly doesn’t spoil the looks either.
The classic buttons and LEDs on the control panel keeps the style minimalistic without making the Bambino Plus more difficult to use than it needs to be.
The Build
Breville backs it with a 2-year limited warranty for peace of mind.
The build quality feels solid for the price, though being so lightweight (about 11lbs) means the machine can move an alarming amount when you’re locking or unlocking the portafilter. It’s best to get into the habit of holding it steady with one hand while you do that. But maybe we’d have more questions if a machine this small was heavy enough for that not to happen.
The included portafilter is the weakest part: it works fine, but it’s not nearly as good as the portafilter Breville includes with the Barista Express or Barista Pro. The plastic used inside it is noticeably cheaper. If that bothers you, there are lots of excellent 54mm portafilter upgrades you can get for it.
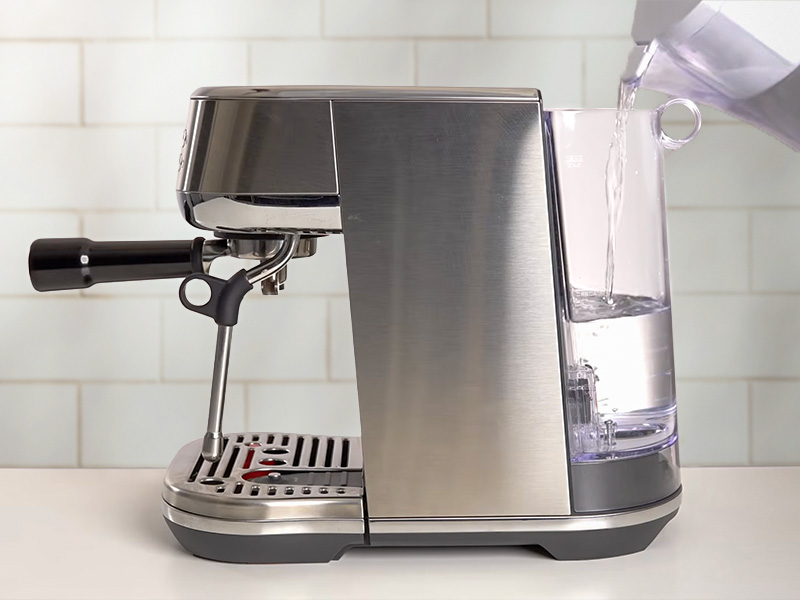
We’ve broken coffee machine water tanks in the past by dropping them, so now we live in perpetual fear of doing it again. There’s a nice little ring on the top of the Bambino Plus’ 64oz tank to put your finger through, designed (presumably) for people like us.
A big upgrade over the Bambino is that the Bambino Plus won’t let you run it dry, which avoids damaging the internal parts.

If you’re not sure that a Breville machine is right for you, check out how they stack up to one of their main competitors, DeLonghi:

Cleaning and Maintenance Review
The Bambino Plus does a couple of little things to keep cleaning nice and simple.
The steam wand auto-purges every time you finish steaming, you just need to remember to wipe it down to avoid milk build-up. The drip tray is the one thing you’ll need to empty daily; it comfortably holds around 5oz (you can push it to 7oz but you’ll need to be very careful removing it at that point).
Backflushing uses the included cleaning disc and cleaning tool, and the built-in cleaning and descaling cycles are straightforward.
The cleaning routine for the Bambino Plus looks something like this:
Daily: Wipe steam wand, rinse portfilter, empty drip tray, rinse showerhead.
Weekly: Run a blank backflush cycle with a cleaning disc and wipe down the exterior.
Periodic: Descale the machine roughly every 2-3 months. This depends on how often you use it and how hard your water is. You should set a reminder so you don’t forget. It takes 20-30 minutes using a descaling solution and isn’t something you want to have to do before your first coffee.
The Competition
The Bambino Plus isn’t the only espresso machine at this price looking to be your “forever machine”
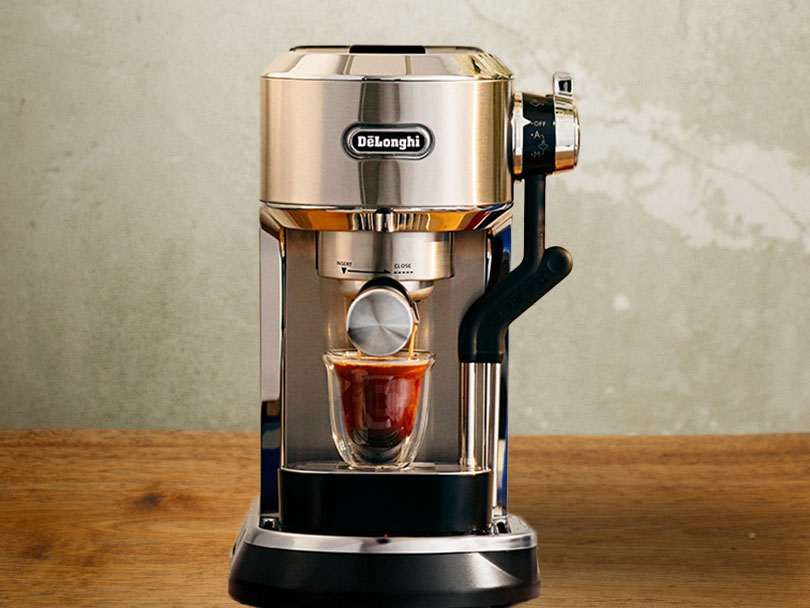
DeLonghi Dedica Maestro Plus
DeLonghi is always the bridesmaid, never the bride, when it comes to portafilter machine competition with Breville.
- ☕️ Espresso Quality: 8/10
- 🥛 Milk Quality: 9.5/10
- 📋 Drinks Options: 7/10
- 💸 Value for Money: 7/10
- 🏆 Overall Rating: 8/10
The Dedica Maestro Plus is DeLonghi’s answer to the Bambino Plus and is the same price at RRP, though frequently discounted.
It runs a thermoblock rather than Breville’s ThermoJet, with three programmable temperature settings and its own automatic milk frothing system. Where it falls short of the Bambino Plus is consistency: a thermoblock doesn’t hold temperature as steadily shot-to-shot as Breville’s PID setup. And the less ideal 51mm portafilter locks you out of the huge 54mm accessory market that makes the Bambino Plus so easy to upgrade.
It’s just not quite as good as the Bambino Plus in every area. So unless you’re particularly a fan of DeLonghi appliances and against Breville ones, the Bambino Plus is the clear winner.
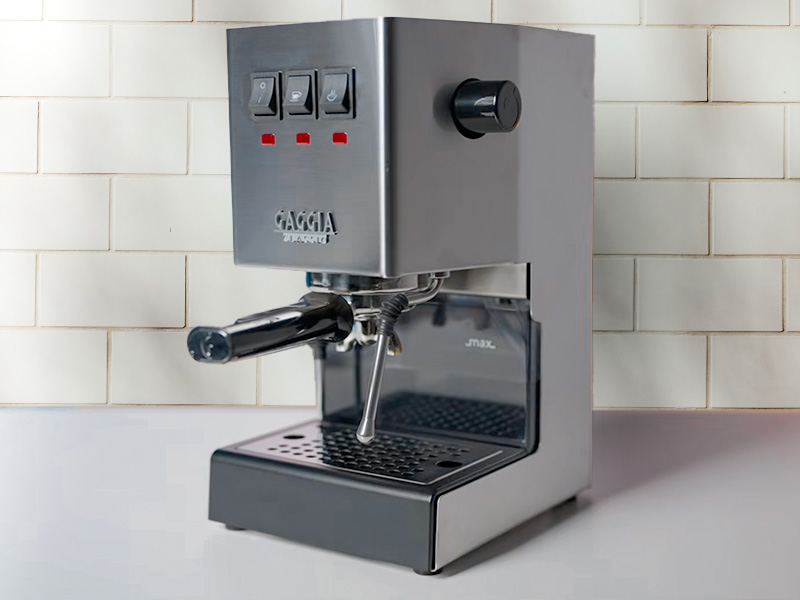
Gaggia Classic E24
- ☕️ Espresso Quality: 10/10
- 🥛 Milk Quality: 9/10
- 📋 Drinks Options: 9/10
- 💸 Value for Money: 8/10
- 🏆 Overall Rating: 9.5/10
The Classic Pro E24 is slightly cheaper (around $450) and is the ideal espresso machine for anyone who wants to get properly obsessed with espresso. It’s got a brass boiler (an upgrade over the older aluminum version), a 58mm commercial-style portafilter, and a 9 bar OPV that meets Specialty Coffee Association extraction standards.
There’s no PID, no auto milk, and no volumetric buttons: everything is manual, including the 2-hole steam wand. This means there’s a steeper learning curve. But the ceiling for how good your shots can be is insane. You can also easily mod the Gaggia to your heart’s content with loads of YouTube videos on installing PIDs and other electronics for pulling better shots.
If you’re an espresso nerd who wants to dig into the minutiae of temperature surfing and shot mechanics, this is undoubtedly the better machine. As long as you don’t care about automatic milk. If you’re just looking to make nice coffees at home, then the Bambino Plus is the more user-friendly option.
The Verdict
The Bambino Plus earns its reputation as one of the best-selling espresso machines for a reason.
It makes extremely good espresso and excellent milk drinks with a small enough learning curve that most people will get there within a couple of weeks. And the ceiling on quality is high enough that you won’t outgrow it in a hurry. Stick to medium or dark roasts, budget for a decent grinder alongside it, and get comfortable holding the machine steady when you lock in the portafilter.
If you’re not totally sold from our hands-on Breville Bambino Plus review, there’s always the Bambino – it costs less, though it doesn’t have automated milk (and the milk wand isn’t as good in general). Or, if you want to fall deep into the espresso rabbit hole, the Gaggia Classic E24 presents a steeper learning curve but a far higher ceiling.
Our biggest takeaway is not to let the Bambino Plus’ budget-friendly price tag fool you. This little machine can make a better flat white than most high street cafes, and that’s really saying something.
Psst… the Bambino Plus is often in the sales, and we’ve seen it for as low as $350. If you spot it below $400, it’s an exceptional buy.