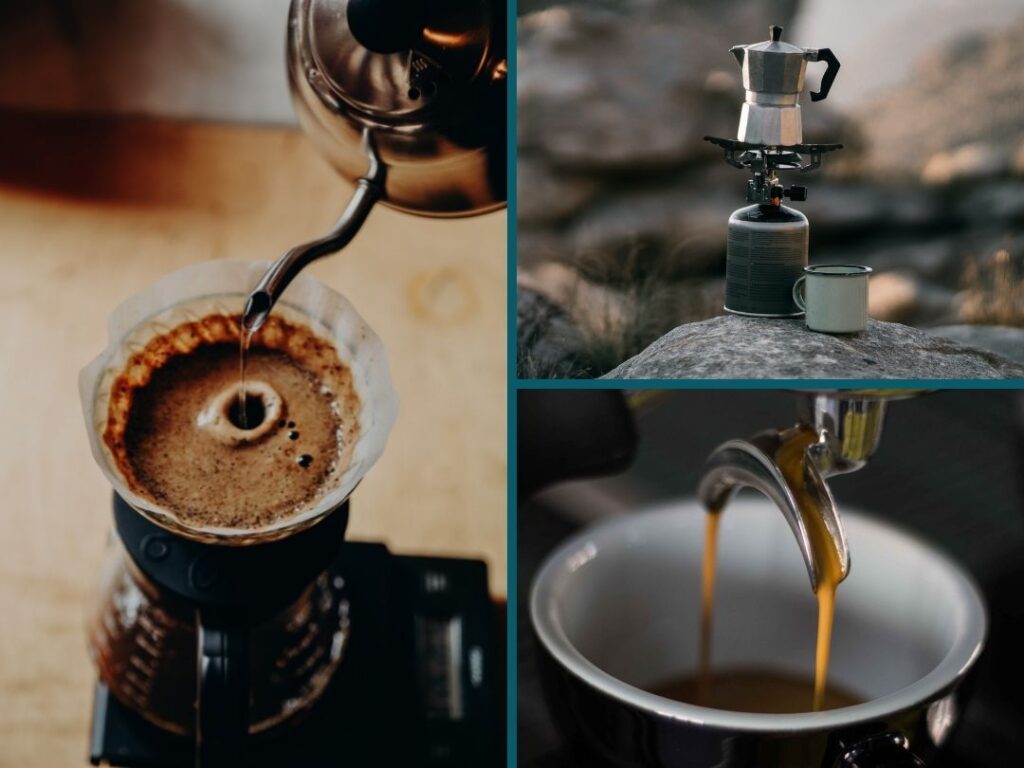
Most budget espresso machines at this price give you a choice: convenience or quality. The cheap ones are easy to use, but the espresso is forgettable. The ones that actually produce good coffee usually require some skill and investment to get there. In this hands-on Breville Bambino review (aka the Sage Bambino in Europe), we discover how this machine sits in genuinely rare territory: it does both.

The Bambino is compact enough to fit almost anywhere and packed with features you’d normally pay twice as much for. Paired with a good grinder and a bit of workflow knowledge, it can produce complex, full-bodied espresso with real depth and character.
The caveat is that investing in a separate grinder is non-negotiable: pre-ground coffee and the Bambino is a frustrating combination. Buy it as part of a proper setup, and it’s one of the best things you can do for your morning coffee at this budget. Heck, there are plenty of more expensive machines that don’t come close to the quality of the Bambino.
We’ve been using the Breville Bambino for months now – the size makes it an ideal machine for us to use daily in our small kitchen. Hundreds of espressos and gallons of milk have passed through the little machine, so we’re feeling very confident we know what it’s like to own one, where it excels, and where it suffers. Let’s dive in:
This article may contain affiliate/ compensated links. As an Amazon Associate, we earn from qualifying purchases at no additional cost to you. For more information please see our disclaimer here.
At a Glance: Breville Bambino Review

Verdict: At $300, the Bambino delivers features that should have no business on a machine at this price. PID temperature control, pre-infusion, volumetric shot programming, and a powerful steam wand capable of proper microfoam – all things you’d expect from machines costing significantly more.
The espresso quality (when paired with a good grinder) is genuinely impressive. Rich, complex shots with real brightness and depth are achievable within a few sessions.
The tradeoff is that you need to learn a pre-heating routine and master your workflow, plus you’ll need to pair the Bambino with a good separate grinder. Neither is complicated, but neither is optional if you want the results the machine is capable of.
Bottom line: This is an exceptional entry-level espresso machine for anyone prepared to invest in a grinder and spend a couple of weeks figuring things out. The potential espresso quality can be far above what you’d expect at this price.

Pros
- Excellent espresso quality
- ThermoJet system is ready in 3 seconds
- PID temperature control for better consistency
- Adjustable pre-infusion is rare at this price
- Dedicated hot water button
- Small footprint

Cons
- Needs a separate grinder
- Pre-heating routine required
- Removing portafilter can be messy
- No low water sensor
- So lightweight that it feels fragile
Who It’s For (And Who It’s Not!)
✅ Buy the Breville Bambino if:
- You want to learn to pull genuine espresso shots at home on a budget. The Bambino is honest with you: it requires involvement on the grind and prep side, and rewards that involvement with high quality espresso.
- Counter space is a real constraint. At 6.25″ wide, this is one of the most compact proper espresso machines available. You’re not compromising on quality to get that footprint.
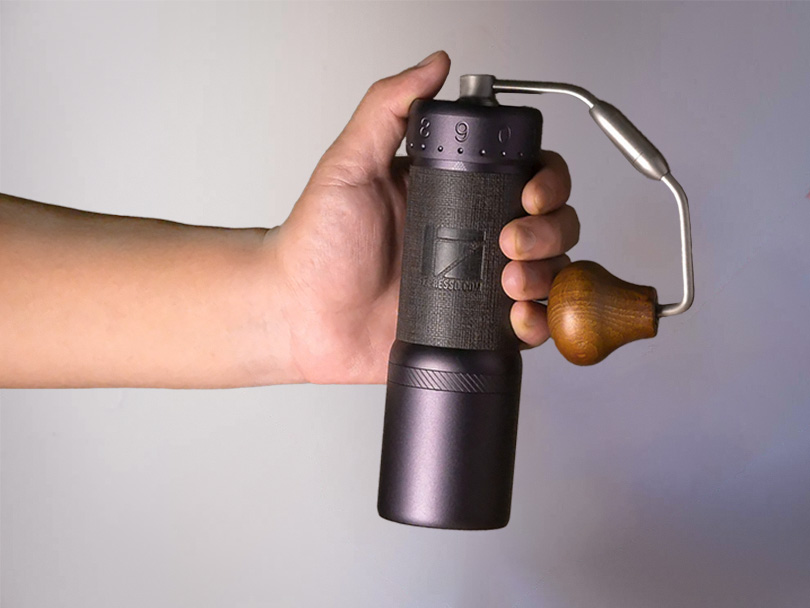
- You’re willing to pair it with a good grinder. We use the 1Zpresso J Ultra manual grinder (see why), which, combined with the Bambino, still comes in well under the price of a mid-range all-in-one machine. And beats most of them for espresso quality.
- You want to make both espresso and milk drinks. The steam wand is capable and powerful, and with a cheap thermometer, you can make good textured milk within a few weeks.
❌ Skip it if:
- You want to use pre-ground coffee. This machine will work, but it won’t shine. Freshly ground coffee is what unlocks the Bambino’s potential.
- You want auto milk steaming. The Bambino Plus handles that for an extra $200. If you’d rather not learn to use the manual steam wand, the Plus is the smarter buy.
- You want a variety of drinks without any involvement. With just four buttons, no presets, no touchscreen, the Bambino is a single-focussed espresso machine, not an all-singing-all-dancing multi-drink maker.
Key Features
1. ThermoJet Heating (very fast)
It takes just three seconds from pressing the brew button to being ready to pull a shot, and under 15 seconds to transition from brewing to steaming. That speed means you don’t have to think about espresso or milk first, the way you would on most single-boiler machines. And makes sleep-deprived mornings a little less painful.
The dedicated hot water button adds to this: genuinely hot water (around 185-190°F) on demand for Americanos, tea, or warming your cup, without having to touch the steam wand.
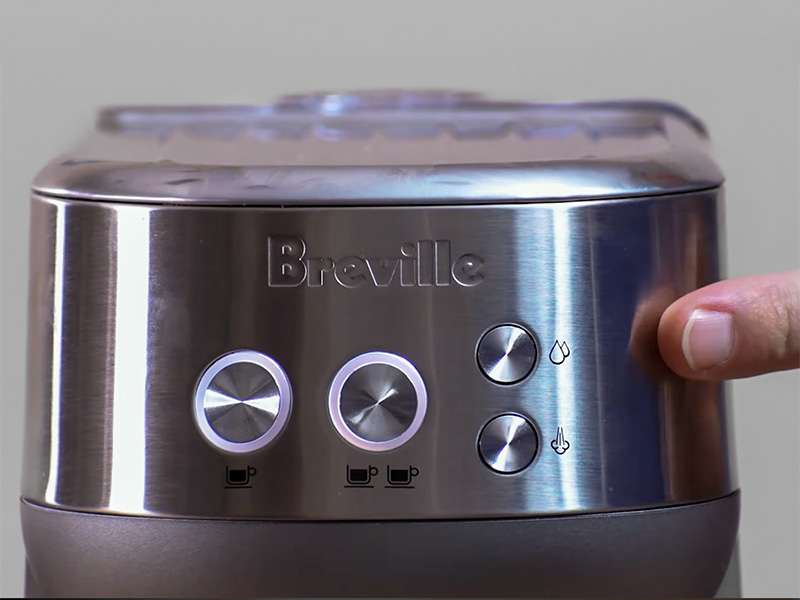
2. PID Temperature Control and Adjustable Pre-Infusion
The Bambino automatically monitors and maintains precise brewing temperature throughout extraction, giving you consistent, repeatable shots. Before full pressure kicks in, it wets the puck at low pressure first, which leads to a more even extraction, better crema, and more prominent aromatics in the cup.
You can also manually control the pre-infusion duration by pressing and holding the shot button, then releasing it when you want full pressure to begin. We’ve tested a LOT of espresso machines across all price points, and rarely see this on budget-friendly models.
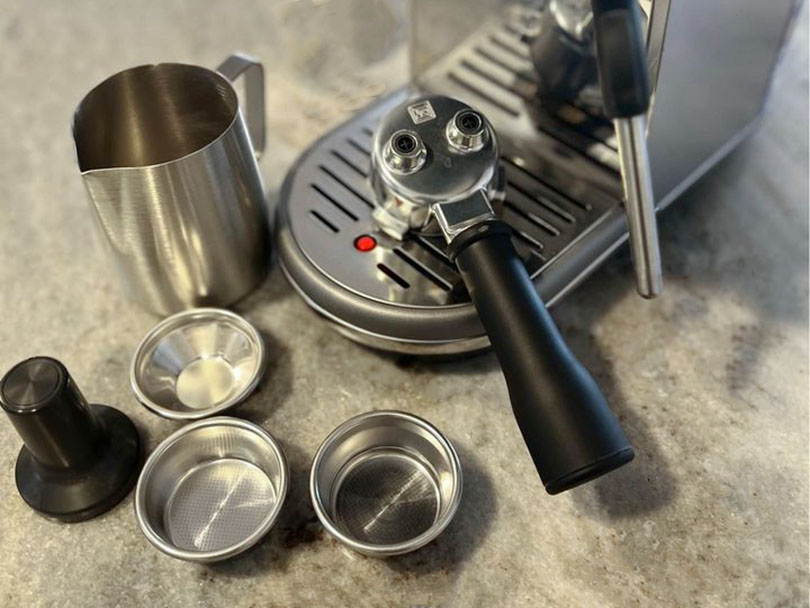
3. 54mm Portafilter and Two Basket Types
A recent update means both single-wall and dual-wall baskets are included in the box. The dual-wall is forgiving and useful early on, while the single-wall is where the real espresso quality comes from.
The 54mm portafilter (max dose of 18g) is also compatible with the full Breville Barista line of accessories, so chopped portafilters, bottomless baskets, and tamper upgrades all fit as you continue your espresso journey – it becomes an obsession far quicker than you expect! It’s a little smaller than the professional standard (58mm), but don’t let that put you off – this is a very capable setup.
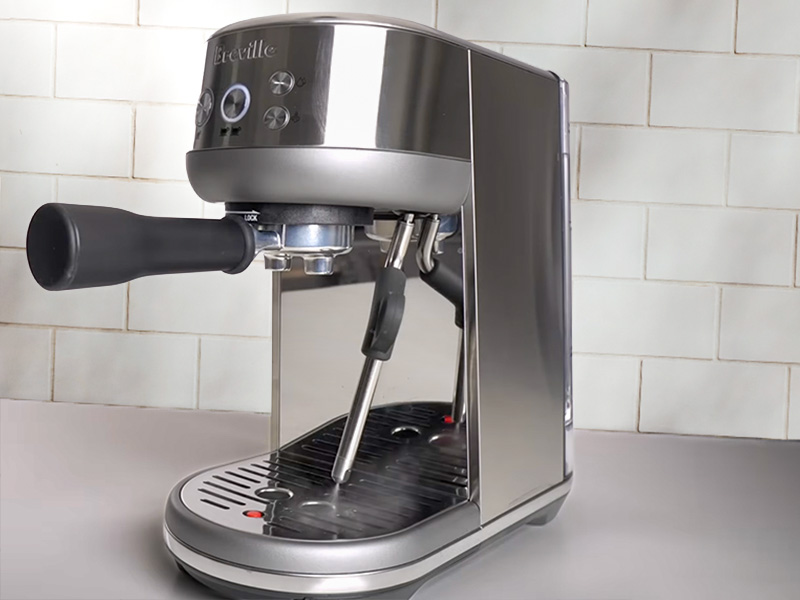
4. Manual Steam Wand
The steam wand rotates 360 degrees and produces enough steam to fully swirl and incorporate milk in the pitcher, giving you that glossy surface finish that means the microfoam is ready to pour.
The single-hole tip gives you more time to find your wand position during aeration, which makes learning easier. You can also upgrade to a multi-hole tip later on if you want to continue upping your skills. Just beware that the replacement nozzle doesn’t come with a washer, so you’ll need to get one separately.
Is the Breville Bambino easy to use?
Once you’ve got the hang of it, the Breville Bambino is very easy to use.
The only thing the manual doesn’t explain well is that this machine needs to be pre-heated before your first shot of the day, or the results will be disappointing.
The ThermoJet heats the water to the right temperature almost instantly, but the rest of the machine (the grouphead, portafilter, and baskets) start cold. A shot pulled immediately like this will be noticeably sour and lukewarm.
The fix is simple: run one or two blank shots (no coffee, just hot water) through the portafilter before your first proper shot. At the same time, run some hot water from the dedicated button into your cup to warm it too. It takes two minutes tops, and the improvement in flavor is worth every second.
This means that the day-to-day process is:
- Run one or two blank shots to pre-heat the grouphead and portafilter
- Use the hot water button to warm your cup
- Grind your dose separately and transfer the grounds into the portafilter
- Distribute evenly and tamp firmly
- Lock the portafilter into the group head (hold the machine, it’s light and can wobble)
- Press single or double: the machine extracts to your programmed volume and stops
- Press the steam button, wait a few seconds for the wand to be ready
- Steam your milk and pour
It might seem like a lot of steps at first, but espresso making is like riding a bike – very quickly, it becomes second nature.
Reprogramming the shot volumes is worth doing early – we found the factory settings too long, and it’s better to know what you’re working with so you can dial in accordingly. You do this by pressing both size buttons together until they flash, then the shot button you want to reprogram. Let it run until you hit your desired output, then press it again to save for all future drinks.
It’s volume-based, not time-based, so it will always run the same amount of water. Ideally, you want to aim for it to take 25-30 seconds to run 50ml through the puck.
One thing we found frustrating is that there’s no 3-way solenoid valve – a fancy way of saying that the puck is still under some pressure when the shot finishes. So if you remove the portafilter immediately, you’ll get a wet, messy puck. We recommend waiting a minute (or until after you’ve steamed your milk) to remove this problem.
If you’ve never used an espresso machine before, it isn’t straightforward to use the Breville Bambino. So be patient and give yourself time to learn. In the end, it’s 100% worth it.

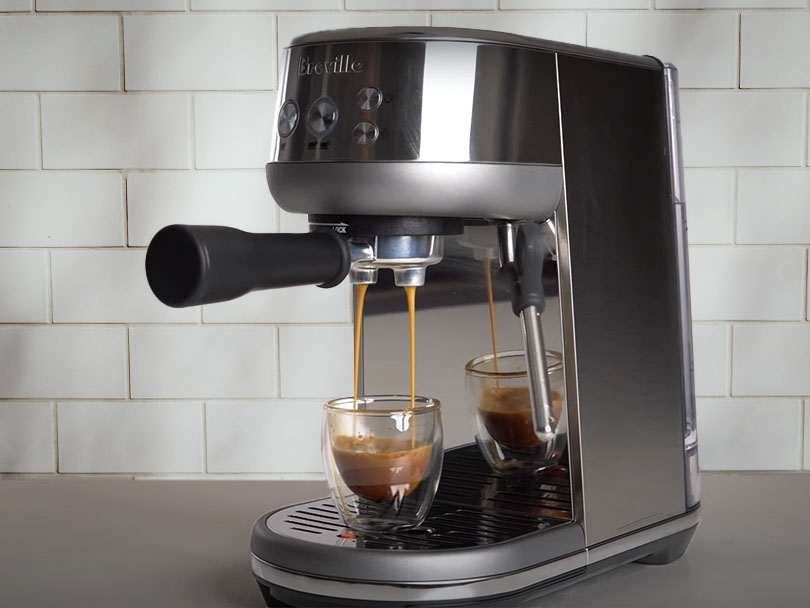
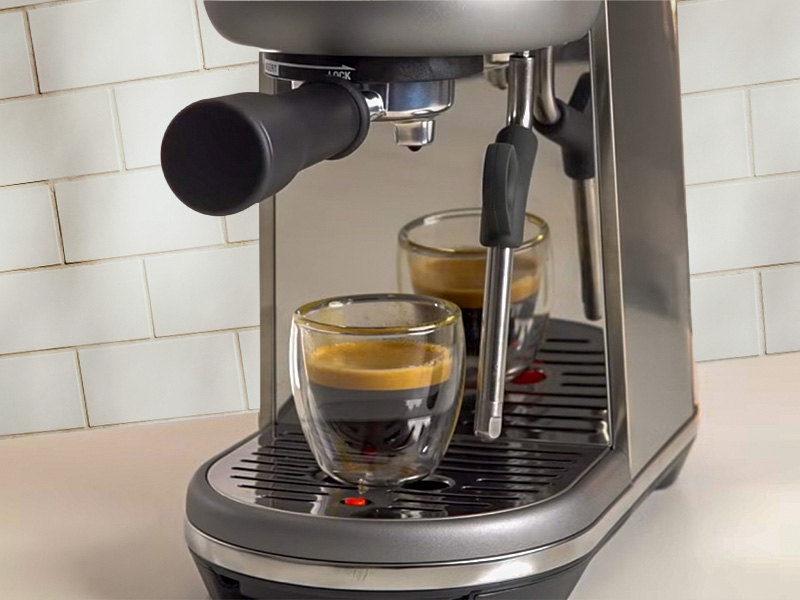
How good is the Espresso?
The espresso from the Breville Bambino is very good. And far better than a machine this cheap should be able to produce.
Once we’d dialled in our settings, the Bambino consistently produced complex, full-bodied espresso with real brightness and a chocolate and dried fruit character. We’d have been pleased with these results from a machine costing three times as much.
The PID temperature control and pre-infusion combo does a great job: shots are consistent, extraction is even, and the crema is defined.
We put the Bambino through the wringer, as we’d expect consistency to drop off when pulling a few shots in a row. But this compact machine held its own pretty impressively. We only had around a 2-second deviation on extraction time; it ran a little slower when pulling the 3rd and 4th shots. As it’s not a professional machine that’s expected to handle high volumes, some variation is reasonable.
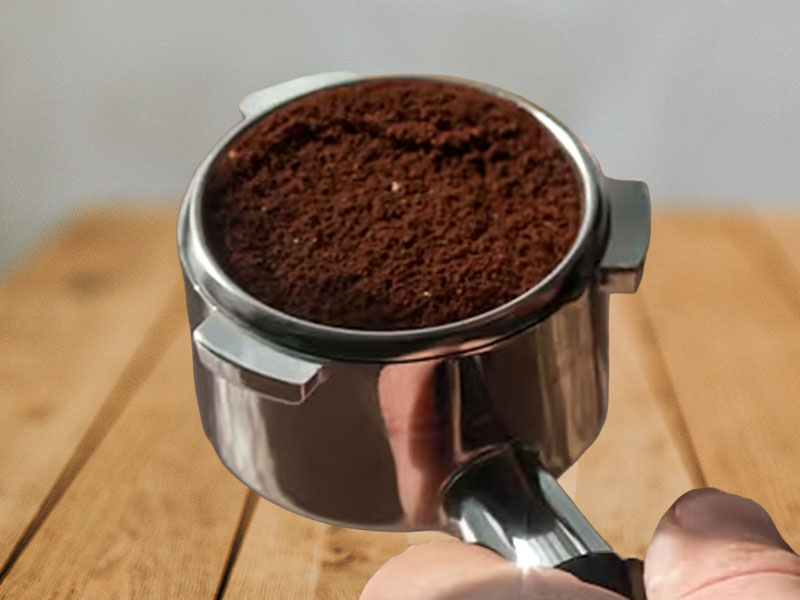
The ceiling for espresso quality will depend entirely on your grinder:
With a quality burr grinder and fresh beans, the results can be excellent. With store-bought pre-ground coffee or a cheap blade grinder, the Bambino exposes you quickly. When you budget for this machine, make sure to budget for buying a grinder too. You don’t have to go crazy, but don’t cheap out either.
To get the absolute best results from the Breville Bambino, you really need a full setup.
You need good beans, a tamper, a good grinder made with espresso brewing in mind, and an accurate coffee scale. As you add or upgrade the items in your espresso setup, you’ll notice the step up in flavor too.
Our Breville Bambino Settings
We opted for a manual grinder when testing for this Breville Bambino review – the 1Zpresso J Ultra – and used the following settings:
- Grind setting 1.3.2 on the J Ultra
- Double unpressurized basket with an 18g dose
- Default brew temperature
- From there, we were consistently hitting 36g of espresso in 28 seconds
This was using medium-dark roast single-origin beans.
The espresso at those settings was everything the machine is capable of: complex and full-bodied with real brightness, and a layered flavor of chocolate and dried fruit that lingered well.
We started off grinding finer than that – 1.2, which is right in the middle of the suggested espresso range for our grinder – but found the shots were too slow and quite bitter. It took us maybe 8 espressos before we got the shots exactly as we wanted them.
We also tested with the dual-wall pressurized basket as a comparison (this one’s more forgiving for beginners):
The espresso was still good, but obviously of lower quality. Flatter, less complex, and without the crema development of the unpressurized basket. The pressurized basket is useful to get confident pulling shots, but move to the standard basket as soon as you’ve found a grind setting that works for you.
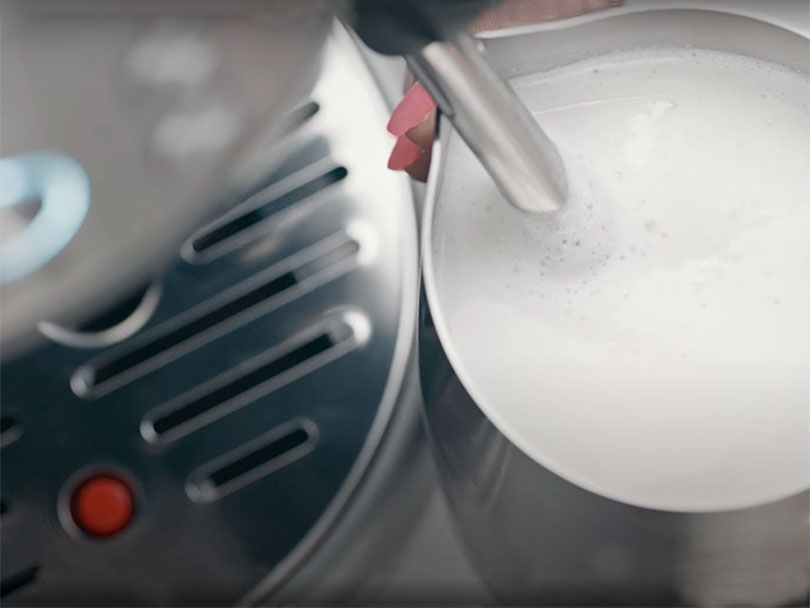
Is the Milk Quality good too?
The milk from the Breville Bambino can be excellent. The super-hot steam helps deliver excellent texture.
This super hot steam means no water gets into your milk, and it’s also very powerful. This is critical for getting the right milk texture for latte art or creating foam for cappuccinos.
We’ve used plenty of steam wands over the years, so we were comfortable straight away. If you haven’t used a manual wand before, you’ll want to pick up a milk thermometer and expect a week or two of practice before results become consistent. Aim for 140-150°F (60-65°C) and focus on getting the milk swirling well during the aeration phase.
The ceiling, once you’re comfortable, is genuinely high. The ThermoJet produces powerful steam, and the wand articulates freely, giving you control over angle and positioning. Proper microfoam for latte art is achievable with practice.
It’s a single-hole tip, which is slower than the 3-hole wand on the Bambino Plus, but more forgiving for anyone still learning. You can also swap out the steam wand nozzle for a 3 or 4-hole one in the future, if you want a cheap upgrade to your machine.
We’ve made good latte art from this machine, and it surprised a few people who assumed a $300 machine couldn’t do it.
Should you use Pre-Ground Coffee or whole beans?
Whole beans, without question. Whilst we would always recommend this, the Breville Bambino is the machine where that advice matters most.
The Bambino has no integrated grinder, which means the quality of your grind is entirely on you. Freshly ground coffee produces the crema, aromatics, and complexity that make the results worth the effort.
Pre-ground coffee, by the time it reaches your portafilter, has lost most of its CO2 and aromatics. It works against everything the machine’s pre-infusion system is trying to do.
We love 1Zpresso grinders and the J Ultra is superb for espresso if you’re comfortable with a manual option (bonus points for not taking up counter space!) Paired with the Bambino, you’re still under $500 for the full setup, and the espresso quality exceeds what most machines under $1000 will produce.
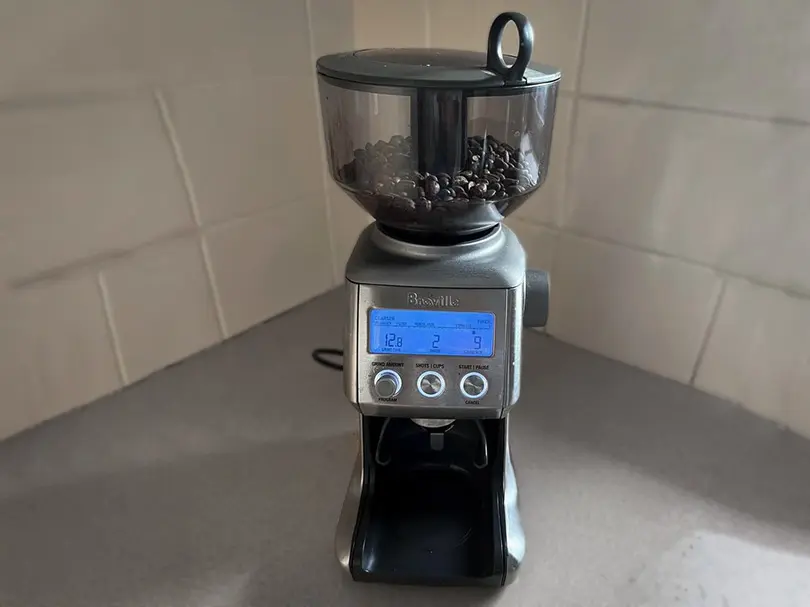
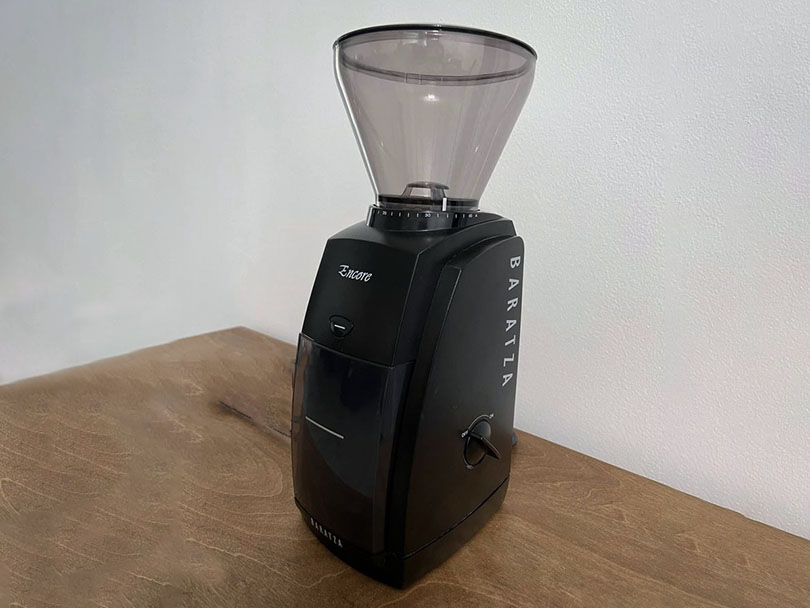
For an electric option, we’d recommend either the Breville Smart Grinder Pro (see our review) or the Baratza Encore ESP for convenience without compromising grind quality.
Grinder Recommendations
All three options come in around the $200 mark:
Design and Build Quality Review
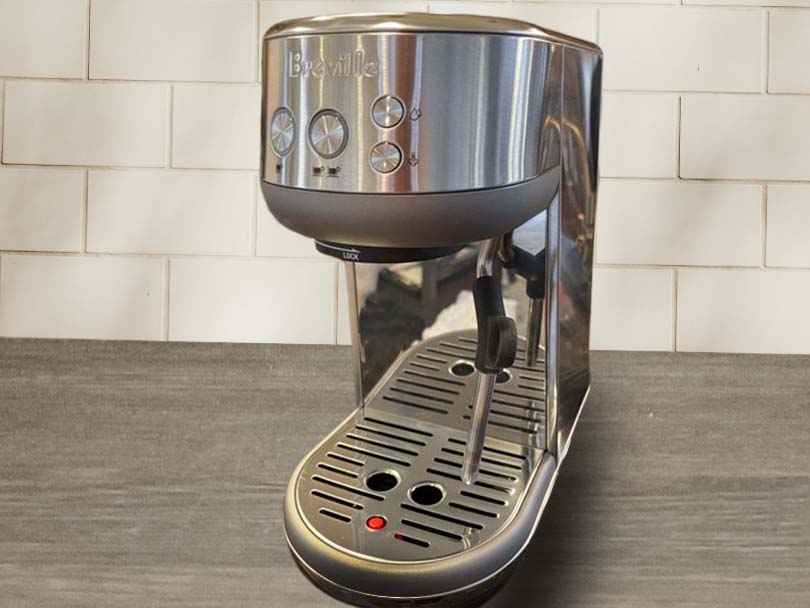
The Looks
Understated is the polite way to describe it. The Bambino doesn’t try to be anything other than what it is: a small, clean machine in brushed stainless steel with four buttons and nothing else. No touchscreen, no pressure gauge, no display. If your kitchen is already busy, it has the decency to stay out of the way.
A relative rarity from Breville, as it isn’t available in other colors. We don’t mind as we’re boring and love a brushed stainless steel machine, but it’s something to consider if that won’t work with your aesthetic.
At 6.25″ wide by 13.5″ deep by 12″ tall, it genuinely does fit in spaces where other machines won’t. For anyone who’s resigned themselves to going without an espresso machine because of counter space, the Bambino is worth measuring up.
The Build
Solid in the places that matter: the stainless steel body, grouphead, and internals feel like they’ll last.
Less solid in the places where they’ve tried to save money for a lower price point:
The portafilter is aluminum rather than stainless steel (the box claims otherwise, which is an error worth knowing about), and the drip tray cover is thinner than you’d get on the Bambino Plus. Neither affects performance, but it’s always good to know these things.
The machine is genuinely very light. That means you’ll need to use your other hand to hold it steady when locking the portafilter in, which becomes a habit quickly, but it did catch me out at first.
The 47oz (1.4l) water tank is fine for a couple of people, but it doesn’t have a low water sensor, so you’ll need to check it yourself rather than rely on the machine to warn you. We just fill it each morning, so it’s not a particularly big issue.
There’s a reason most Breville machines have been fitted with a low water sensor recently – running the pump dry isn’t good for it.
On longevity, Breville machines have a strong track record. With regular descaling and basic maintenance, it should comfortably last 5 years, and plenty of first-generation Bambinos are still in daily use. The 1-year warranty also gives you peace of mind if anything happens when you first get it.
If you’re not sure that a Breville machine is right for you, check out how they stack up to one of their main competitors, DeLonghi:
Cleaning and Maintenance Review
Easy cleaning and fairly low maintenance for a semi-automatic machine.
The puck knocks out cleanly from the portafilter, and the basket rinses easily.
The most important habit to get into is cleaning the steam wand – dried milk is stubborn and nasty. The wand is much easier to maintain if you purge it and wipe it down immediately after each use. Just don’t burn yourself.
The cleaning routine for the Bambino looks something like this:
Daily: Wipe and purge the steam wand immediately after use. Rinse the portafilter basket. Empty and rinse the drip tray. Quick rinse of the grouphead.
Weekly: Run a blank backflush cycle with water (there’s no blind filter included, but a simple cleaning disc works). Wipe down the exterior and drip tray cover.
Periodic: Descale the machine roughly every 2-3 months, depending on your water hardness. I like to set a reminder on my phone so I do it before it becomes mission-critical, as the machine won’t work when it needs to be done, and I don’t need that kind of hassle pre-caffeine. A packet of descaling powder is included in the box, and you’ll need to set aside 20-30 minutes.
The Competition
Not all budget espresso machines are created equal – these are the top 2 we’d recommend weighing up when deciding whether the Bambino is right for you.
The Bambino Plus
The natural upgrade and worth it if milk drinks are a big part of your routine.
The Plus adds an auto-frothing system with three temperature and three texture levels, a 3-hole steam wand for faster manual steaming, and a 68oz water tank with a low water sensor. The espresso side is identical to the Bambino.
Whether $200 more is worth it comes down entirely to the milk question:
If you’re making flat whites or lattes daily and don’t want to learn a manual steam wand, the Plus makes your mornings significantly easier. If you’re mainly pulling espresso shots, or you’re happy to learn the manual wand, save the money and buy a better grinder with it.
![]() For a full blow-by-blow account of this battle you can check out our Breville Bambino vs Bambino Plus article.
For a full blow-by-blow account of this battle you can check out our Breville Bambino vs Bambino Plus article.

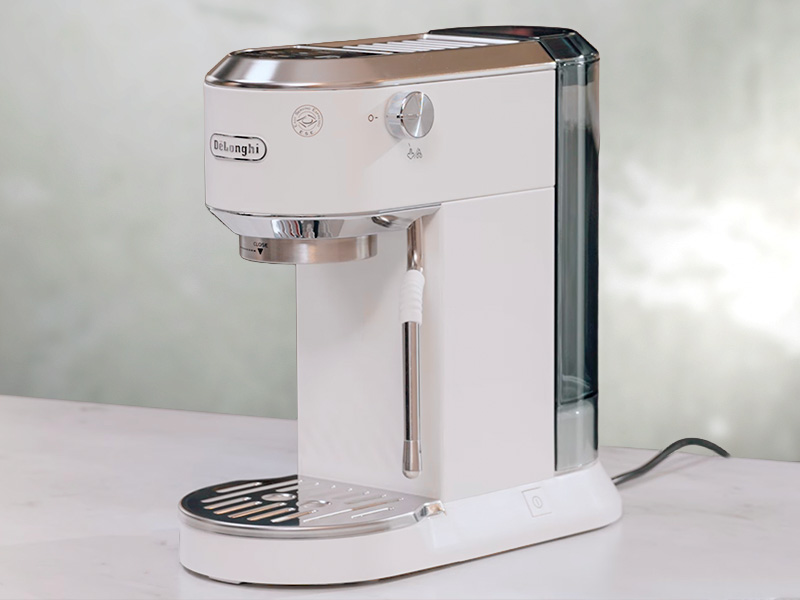
DeLonghi Dedica Duo
The Dedica Duo is the same price and a similar footprint, so it deserves a straight comparison. The Duo adds a cold brew setting, which the Bambino doesn’t have – which is major for anyone who loves an iced coffee.
Honestly though, the espresso side doesn’t keep up. The Bambino’s PID, pre-infusion control, and volumetric programming give it a clear edge in shot consistency and quality. The Dedica Duo’s grind-to-cup workflow is less flexible, and the results showed it in side-by-side testing.
The milk wand is also seriously below the Bambino. It’s near impossible to get good microfoam for flat whites or cappuccinos. Latte art really isn’t on the cards so anyone who loves a milk drink is better off with the Bambino.
The Verdict
The Breville Bambino is one of those rare machines where the value is hard to argue with.
It requires a good grinder and a small amount of workflow knowledge, but in return, it gives you espresso quality that most people won’t believe came from a $300 machine. The steam wand is capable of genuinely impressive microfoam once you’re comfortable with it, and the compact footprint means almost any kitchen can accommodate it.
If you take one thing away from this Breville Bambino review, let it be this:
The blank shot pre-heat is not optional if you want good results. Run two blank shots through the grouphead before your first espresso each day, use the hot water button to warm your cup at the same time, and the Bambino will reward you with shots that make the routine entirely worth it.
Psst… the Bambino regularly goes on sale, and we’ve seen it for as low as $199. If you spot it below $250, it’s an exceptional buy.