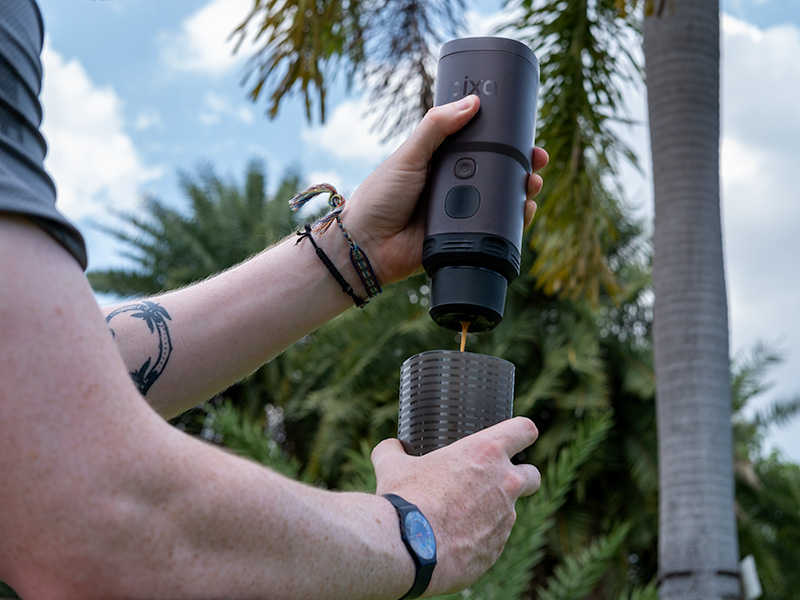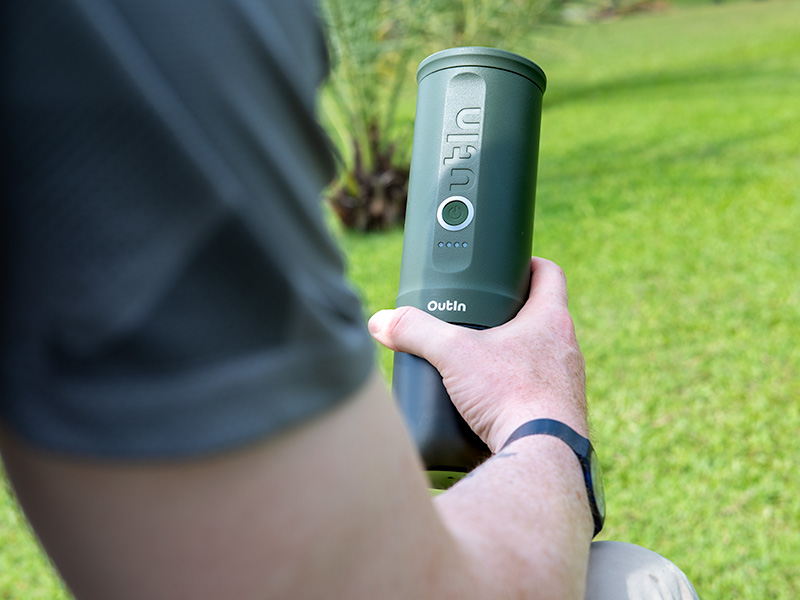

Our latest obsession is road tripping to places so far off grid, there’s no coffee shop within a 2-day radius. So we’ve been testing a lot of battery-powered espresso machines to keep us caffeinated along the way – and have been blown away by how far the offerings have come. Two of the best we’ve tested are the OutIn Nano and Wacaco Pixapresso. But how do they measure up against each other?
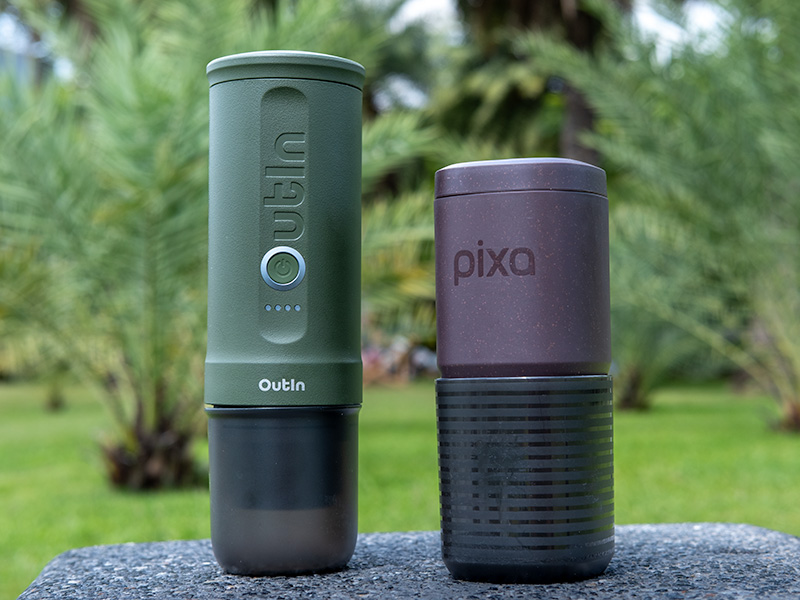
For context, the Nano is part of Outin’s extensive range of portable espresso products and accessories, promising top-quality espresso anywhere. The Pixapresso is Wacaco’s first battery-powered machine that doesn’t require hot water, though they’re a long-established name in the portable espresso market.
We preferred the Wacaco Pixapresso because it offers an 8 or 16g dose as standard, has 3 brewing temperatures, pre-infusion, and different drinks settings. For the much better espresso flavor, we were willing to forgive just how slow it is to heat up. That said, if you’re planning to just use Nespresso pods, the OutIn is faster, cheaper, and lighter.
The addition of the Basket Plus for the OutIn changes the dynamic a little, but while these are two very similar machines, we think they’re aimed at very different people. We made many, many espressos, took them out hiking, to the beach, and on lots of other fun dates. Here’s all our thoughts on what we liked, didn’t like, and which one’s right for you:
This article may contain affiliate/ compensated links. As an Amazon Associate, we earn from qualifying purchases at no additional cost to you. For more information please see our disclaimer here.

At a Glance: The Numbers
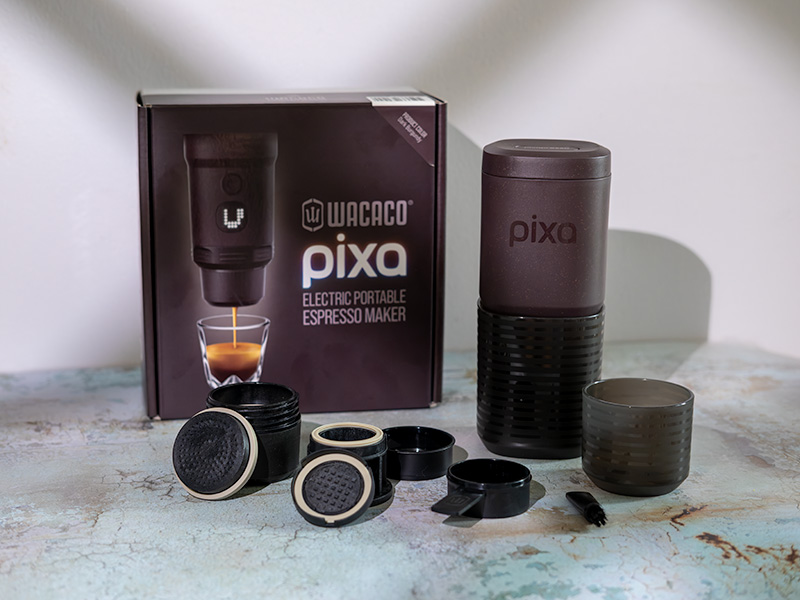
The Pixapresso can make better espresso and has replaceable batteries. But is heavier and much slower.
☕️ Coffee Quality: 9/10
✈️ Portability: 8/10
✨ Works with: Nespresso pods or ground coffee (8 or 16g dose)
🔥 Heat-up time: 4.5 mins
🔋 Battery life: 4 espressos
⌚️ Time to fully charge: Roughly 2.5 hours
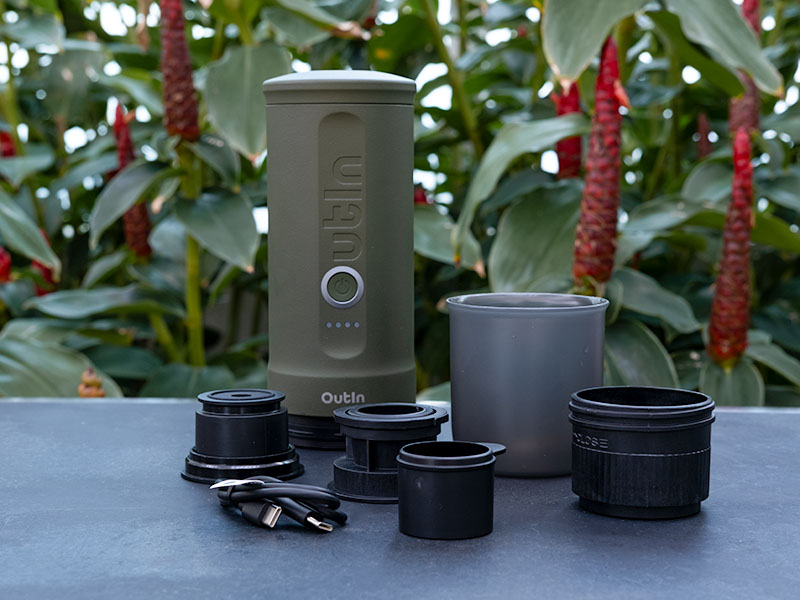
The OutIn is lighter and heats up much faster. It’s frustrating to use with fresh ground coffee but ideal for pod espresso on the go.
☕️ Coffee Quality: 6/10
✈️ Portability: 9/10
✨ Works with: Nespresso pods or ground coffee (8g dose)
🔥 Heat-up time: 2.25 mins
🔋 Battery Life: 4 espressos
⌚️ Time to fully charge: Roughly 2 hours
Psst… Heat-up time is for 60ml water to 92°C / 198°F. Battery life refers to the number of drinks made from room temperature water – if you heat the water separately, you’ll get hundreds of espressos on a single charge

Quickly Decide Which Is Best For You
✅ Buy the Wacaco Pixapresso if:
- You want the best-tasting espresso from freshly ground beans. The 16g basket, pre-infusion option, and different temperature settings make it easier to pull high-quality espresso from the Pixapresso.
- You’re going to use a variety of beans. Having the 3 temperature settings makes it easier to move from dark roast to medium roast beans and still get great coffee.
- Patience is one of your virtues. Taking over 4 minutes to heat water for your espresso can feel like forever. Or it can just be a quiet time to chill out and take in your surroundings. Depends on who you are as a person.
- Weight isn’t your number 1 priority. It’s not super heavy, but it is 3oz (85g) heavier than the OutIn Nano. If you’re hiking a long way, then saving a couple of ounces sounds really good. If you’re just chucking stuff in the back of the car, then you maybe don’t care so much.
✅ Buy the OutIn Nano if:
- You’ll only be using Nespresso pods. If you’re looking for a machine to just chuck a pod in on a hike or when out and about, then the Nano is equally as good as the Pixapresso but a little lighter, faster, and cheaper.
- You want to make multiple espressos at a time. That faster heat-up time will really matter if you’re making 2 or 3 coffees in a row. You’ll be nearly 8 minutes faster with the OutIn – a huge difference.
- Every ounce counts. Whether you’re hiking or taking it as carry-on luggage (it can’t go in a checked bag), if you’re tight on weight, the little saving of 3oz/85g can be a difference-maker.
- You currently use pre-ground coffee for espresso at home. If you’re used to chucking a scoop of pre-ground coffee in your machine, then the OutIn will work fine too. 8g of coffee for an Italian-style espresso shot with minimal fuss and good crema, though you need to be careful not to jam the machine.

How we Tested
We made dozens of coffees with both machines to get a true feel for using them every day and what their capabilities were. Both machines were tested with:
- The same single-origin Thai medium-dark roast coffee beans, freshly ground with our go-to manual grinder – the 1Zpresso J-Ultra
- Unbranded Nespresso original coffee pods
- Hot water at home to focus on dialing in shots as best we could on both machines
- Cold water on trips to the park, beach, and hikes to get a feel for them “as intended” using the self-heating mechanism
We also timed how long each machine took to heat up the same volume of water to the same temperature for fairness in getting a good comparison.
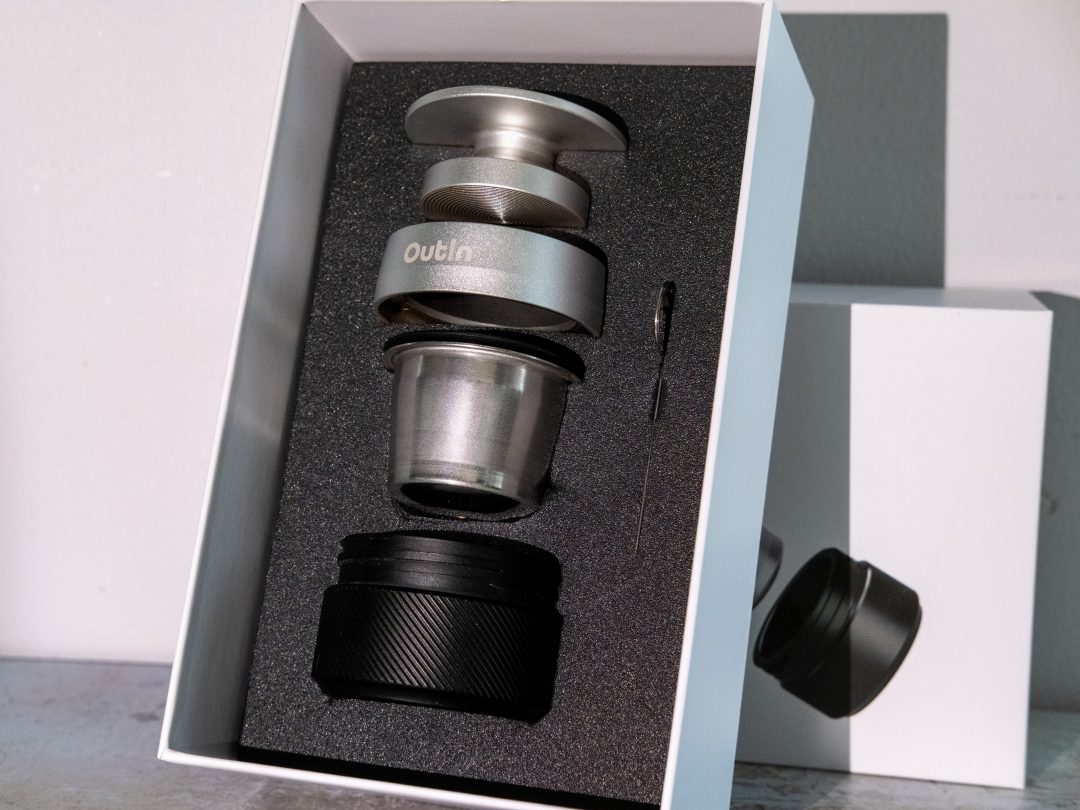
As the machines are fundamentally quite different, we bought the Basket Plus add-on for the OutIn Nano too. This meant we could compare both machines with a 16g dose and an unpressurized basket, so we were taste-testing like-for-like.

OutIn Nano vs Wacaco Pixapresso: Design and Portability
Size & Weight
| OutIn Nano | Wacaco Pixapresso | |
|---|---|---|
| Diameter | 2.76″ (7.1cm) | 2.9″ (7.4cm) |
| Height | 9.06″ (23cm) | 7.12″ (18.1cm) |
| Weight | 23.6oz (670g) | 26.6oz (755g) |
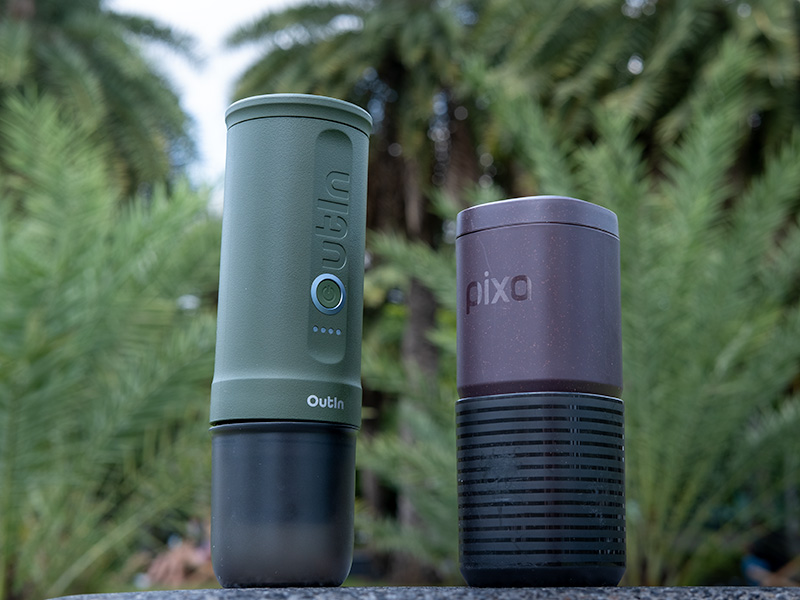
Whilst the OutIn Nano is slightly narrower, it’s 2 inches taller than the Wacaco Pixapresso. This means the Nano will take up around 7 cubic inches more space in your bag. Is that actually a lot? No. But when it comes to filling that backpack, maybe every bit of space counts for you.
The OutIn is slightly lighter than the Pixapresso, though. For us, this is a much bigger deal. You’re going to feel those extra ounces on a really long hike or at the airport when your carry-on bag is weighed, far more than you’ll notice a slightly bigger machine.
Build Quality
As you’d expect, both are mostly made of plastic. Whilst they’ve both sacrificed some accessory durability to keep them small and light, the actual machines are solid. They feel like they could be dropped without breaking (not a test we’re confident enough to try), though the Pixapresso got a lot more scratched up just from being in our bag.
If you spend the extra to upgrade the OutIn to the Basket Plus (16g dose and unpressurized basket), you get a stainless steel basket and accessories instead of plastic. The Pixapresso is better in that it offers a 16g dose as standard, but it’s in the plastic basket. If that sort of thing matters to you, it’s worth knowing.
The biggest difference for us is that Wacaco offers replacement batteries for the Pixapresso if it dies. So you don’t need to buy a whole new machine, just a new battery. We’re big fans of this, as it could easily turn a 2-year espresso maker into a 4 or 5-year one.
Practicalities of Travel
Other than the weight and very small size differences, traveling with each mostly depends on what accessories you want to bring with you.
Pixapresso
With the Pixapresso, you get:
- 2 baskets (one for pods and one for grounds)
- 2 cups
- Dosing funnel
- Combined scoop/tamper
- Cleaning brush
- USB-C charging cable
- A very cheap feeling carry bag
If you wanted to take all the parts with you, you’d struggle to pack them all nicely. Ideally, you’d pick just one basket and store it inside the water tank. Then attach the larger cup to the Pixapresso. This will easily fit inside the bag with the accessories separate, though it won’t have any protection against knocks.
If you really wanted to have everything contained, you could put the accessories inside the water tank and attach your chosen basket to the Pixapresso. But the cup wouldn’t attach properly and would make the whole thing longer.
In the unlikely event you want to travel with both baskets, it’s a lot more awkward and certainly not the tidiest. So we recommend picking the one you’ll actually brew with and leaving the other at home.
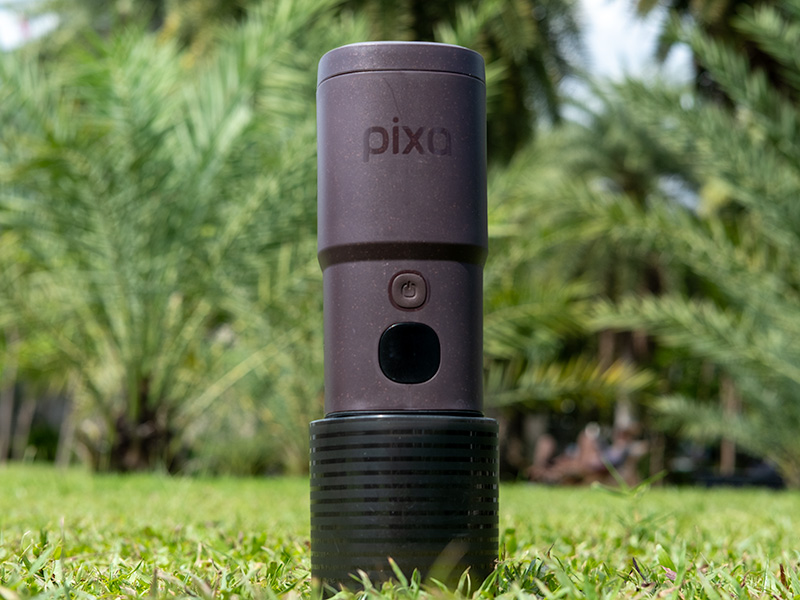
The positives are that the seal around the base and the screw-on lid make the Pixapresso very unlikely to leak. As someone who has coffee stains on everything, I really appreciate not getting more coffee stains on things from inside my bag.
OutIn Nano
The Nano has similar problems with storing all the various pieces of the coffee maker if you’re taking everything when you travel.
Unfortunately, the Basket Plus add-on really isn’t designed for easy transportation, which is a real shame, as it makes such a big difference to the quality of your shots. The dosing funnel and tamper are heavy, solid metal, and the WDT tool is small and very easy to lose.
It also doesn’t have the most secure lid or cup – we had to go digging around our bag almost every time we wanted to use the OutIn, as the cup had fallen off in transit. This also means coffee drips are much more likely than with the Pixapresso if you’re not able to clean it before packing.
Both companies sell a case to house all the bits. But they’re pretty big and bulky, which starts to defeat the purpose of a small, portable espresso machine. We didn’t buy them, though, so we can’t confirm or deny whether they’re any good.

Which is Easier to Use?
They’re both relatively simple to use, especially if you use Nespresso pods. However, they’ll take a little more getting used to if you use ground coffee.
OutIn Nano
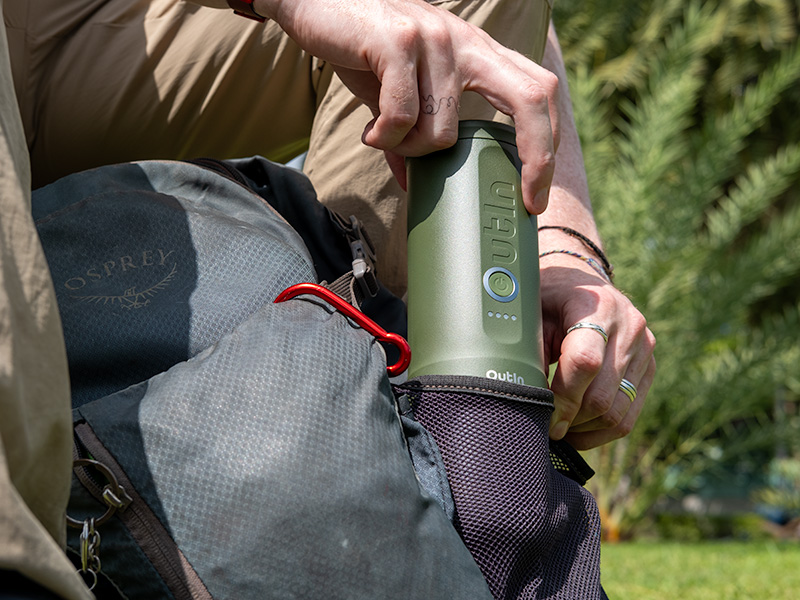
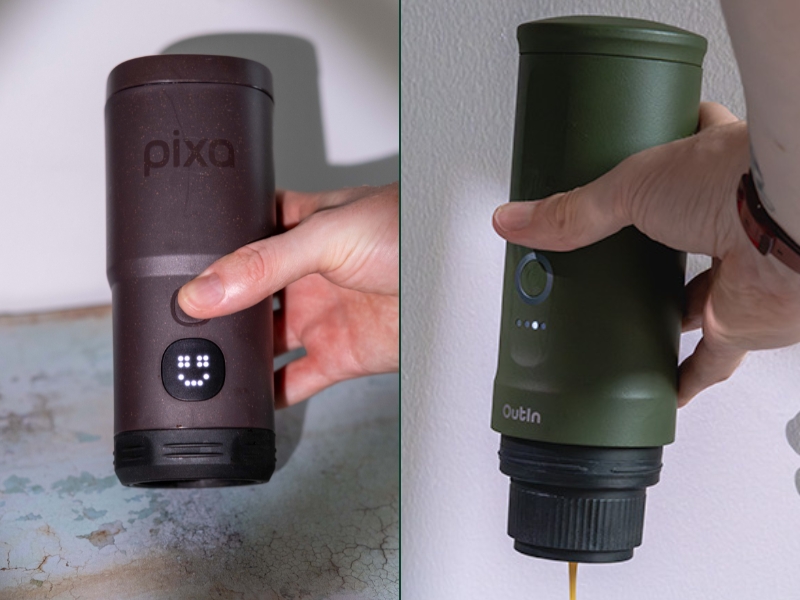
The OutIn Nano only has one button. You turn it on, then long-press the button to start either heating or brewing, depending on whether you’re using cold or hot water. Once it’s heated up, it will brew immediately, so be ready with your cup.
Pod brewing is incredibly easy: pod in basket, screw into machine, and off you go. With pre-ground coffee, it’s also nice and easy. The scoop fits nicely just inside the basket, avoiding any spills; then the back of the scoop doubles as a tamper. Screw that in, and off you go.
My annoyance comes when trying to use freshly ground coffee, specifically moving it from the grinder cup to the basket. As there’s no dosing funnel and the basket is so small, I made a mess every single time (and wasted a lot of coffee). We even tried making a funnel out of cardboard, which helped but didn’t solve the issue.
This problem is fixed with the Basket Plus kit, as it comes with a lovely dosing funnel, WDT tool, and tamper. Then puck preparation becomes a really nice experience. But that’s another $40.
It’s also really easy to jam the OutIn Nano, especially when you’re dialing in your grind. This happened to us several times, and we had to cool the bottom section before we could unscrew it.
 Read next: Our full OutIn Nano review
Pixapresso
The Wacaco Pixapresso has more settings to play with. You can choose your brew size when heating the water, select your temperature, and turn pre-infusion on or off. But there are only two buttons: the little display is a touchscreen, and the on/off button, so it’s not difficult to use. Having said that, the screen isn’t the best, but it does the job.
Puck prep is made easier by having a dosing funnel. It’s quite small, but still infinitely better and puts the Pixapresso way above the OutIn Nano in terms of ease of use for me. But the pod setup is basically identical. And the scoop works really nicely for pre-ground and also doubles as the tamper. Though, just like the Nano, it feels flimsy.
Another nice touch is when you’re heating water. After pushing the on/off button to start, the screen shows the temperature going up, then you have to push the button again to start brewing when it’s ready. I find this a little nicer than the Nano just automatically brewing when it’s good to go, as you don’t have to hold the machine over the cup in anticipation.
Compared to other Wacaco models like the Picopresso and Nanopresso, this is much nicer to use as you don’t have to generate the pressure yourself.
Read next: Our full Wacaco Pixapresso review
Winner
The Pixapresso is easier to use for the bit that matters most – getting the coffee grounds into the machine to brew. Don’t get me wrong, nothing is confusing or complex on either machine, but the OutIn really annoyed me when trying to transfer freshly ground coffee to the 8g basket. It also jammed much more frequently.

Taste Test
Both machines are capable of pulling good espresso, with a little work. The ceiling isn’t comparable to a quality countertop machine or a manual machine like the portable Leverpresso Lite, but we were pleasantly surprised by what you can get when combined with a good espresso grinder and preheating (if using hot water). Especially considering they’re both under $200.
When using Nespresso pods, we couldn’t taste any difference between the OutIn Nano and Wacaco Pixapresso. Ground coffee is a different story.
The elephant in the room is that you can use a 16g dose with the Pixapresso as standard, and you can make the basket unpressurized by removing a spring from the bottom of the basket. So, without any add-ons, the Pixapresso is clearly better – it can brew richer, fuller, more complex espresso that the small 8g basket on the OutIn Nano doesn’t even come close to.
The other thing to consider is that the Pixapresso has a 5-second pre-infusion and three brewing temperatures.
The OutIn Nano brews at 198°F (92°C), which is fine, but the Pixapresso also brews at 190 and 205°F (88 and 96°C). If you like a really dark roast, you’ll love that lower brewing temp. Or, if you like medium roasts or higher-density coffees (like high-elevation single origins), the highest temperature can handle those.
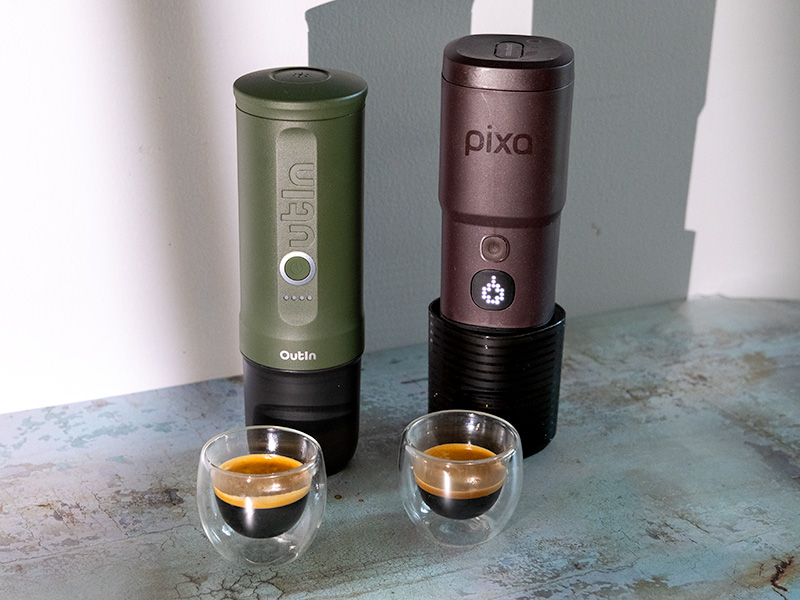
Our Wacaco Pixapresso Settings
These are our best settings with the unpressurized basket (see our full review for details on how to make it unpressurized):

- Grind setting 1.6.7 on the 1Zpresso J Ultra grinder (coarser than we’d typically use for espresso)
- 16g dose
- Pre-infusion turned on
- 55 ml water straight off the boil (198°F / 92°C if using the Pixapresso to heat)
- We got 32g out in 26 seconds
- Taste: Impressive – full-bodied, chocolate-and-nut style with some tropical fruit notes just breaking through.
Our OutIn Nano Settings
These are our best settings using the standard basket that comes with the Nano:
- Grind setting 1.3.5 on the 1Zpresso J Ultra grinder
- 6g dose, light tamp
- Water straight off the boil
- We got 20g out in 18 seconds
- Taste: Very one-dimensional and a little bitter. Any attempt to get closer to a 1:2 espresso ratio tasted awful.
Curveball – Using the Nano Basket Plus Upgrade
The Basket Plus for the OutIn Nano allows a 16g dose in an unpressurized basket and makes an enormous difference to the quality of the espresso.
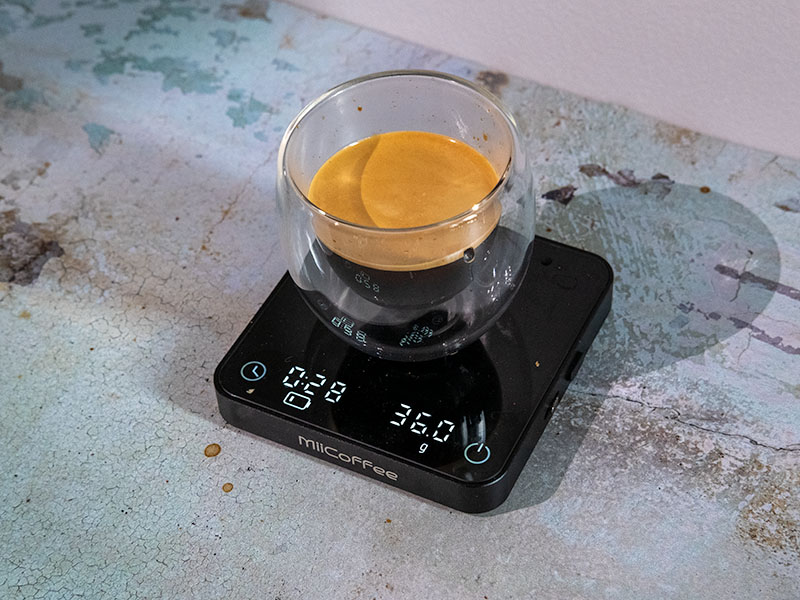
We (unsurprisingly) got much richer, fuller, and more nuanced shots compared with the 8g pressurized version. Once dialed in, we were getting 36g out in 28s – and we were actually happy to drink these shots.
It’s not really designed for travel, though. The metal dosing funnel and tamper are heavy, and the WDT tool is flimsy and will 100% get bent out of shape in 5 minutes in your bag.
It sort of begs the question: who is this for? Unless you make real shots at home and then pod coffee when you travel, or simply don’t care about the weight you need to carry, it kind of misses the mark.
OutIn is pushing hard for people to use this as both their home and travel machine, but by the time you buy all the accessories, you’re looking at the price of a Breville Bambino, which is a much better espresso machine and also foams milk. You could take your full setup on the road, but the carry case is the size of a laptop bag once everything is in it. I don’t really understand why you’d bother when you can just get the Wacaco Pixapresso in its neat little package.
Winner
Without a doubt, the Pixapresso takes the W.
Straight out of the box, the Pixapresso’s larger dose makes a huge difference to the potential taste. Even when using the OutIn Nano Basket Plus, the Pixapresso still offers pre-infusion and multiple brewing temperatures. Plus, you can make the basket unpressurized for more complexity in your shots. It’s a resounding win for us.
Battery Life & Heat-Up time
Both machines will brew 4 single espressos on a single charge, heating 60ml of water from around room temperature (roughly 70°F / 21°C). This is to the 198°F (92°C) setting on the Wacaco; you won’t get an extra shot by brewing to 190°F, but you’ll only get 3 espressos when heating the water to 205°F (96°C).
More water means fewer brew cycles, but the machines give you basically the same number of espressos from a full battery; the big difference is the heat-up time.
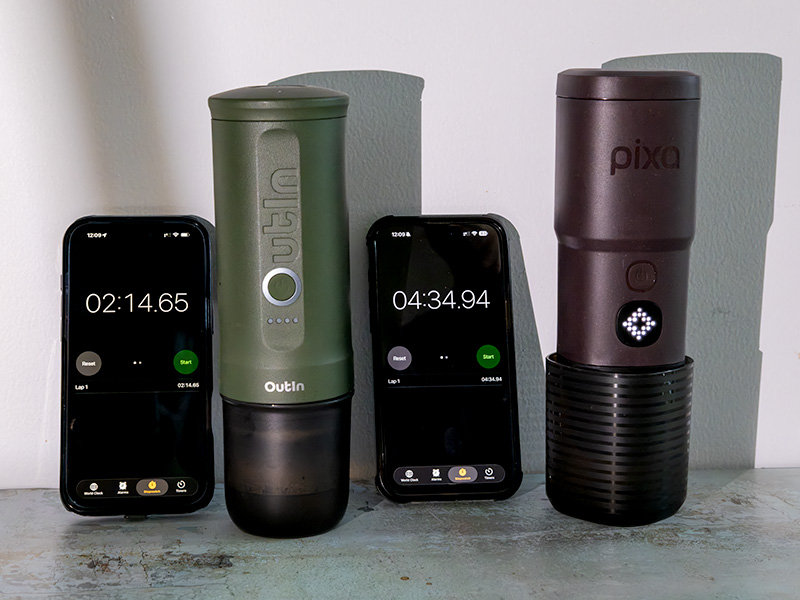
We timed both the Nano and Pixapresso to heat 60ml of water to 198°F (92°C). The OutIn Nano heated the water in 2 minutes and 15 seconds, whilst the Pixapresso took a whopping 4 minutes and 35 seconds.
We don’t really know why it took the Pixapresso so much longer to heat up but you’re going to notice that sort of a wait, especially if you’re brewing multiple espressos.
Winner
The OutIn wins by a country mile. Same number of brews, but in half the time. For the impatient, this is a big difference to factor in.

Overall Winner
We think the Wacaco Pixapresso is the clear winner, despite the slow heat-up time. The drawbacks are generally pretty small – it’s a little heavier, and it takes nearly 5 minutes to heat the water. If you’re out hiking, camping, or at the beach and making an espresso, do you care about those extra few minutes? Probably not.
The potential espresso quality is higher too, thanks to the 16g dose and the ability to use the basket as either pressurized (beginner-friendly) or unpressurized (more advanced), depending on your preference.
It costs $10 more (at the time of writing), but if you want the comparable 16g on the OutIn Nano, you’ll need to spend another $40 for the Basket Plus upgrade. This makes the Pixapresso the better value battery-powered espresso machine.
The single reason we’d pick the OutIn Nano is if you’re a hiker and only want to use Nespresso-style pods. In that case, take the slightly lighter, cheaper, and faster machine for your hiking coffees.