
Handheld espresso machines usually make you pick a side: real control over your shot, or something you can actually use without the instructions open on your lap. The Pixapresso is Wacaco’s attempt to give you both in a rechargeable machine that fits in a bag. And after weeks of pulling shots at home and on the road, we’re convinced it mostly pulls it off.

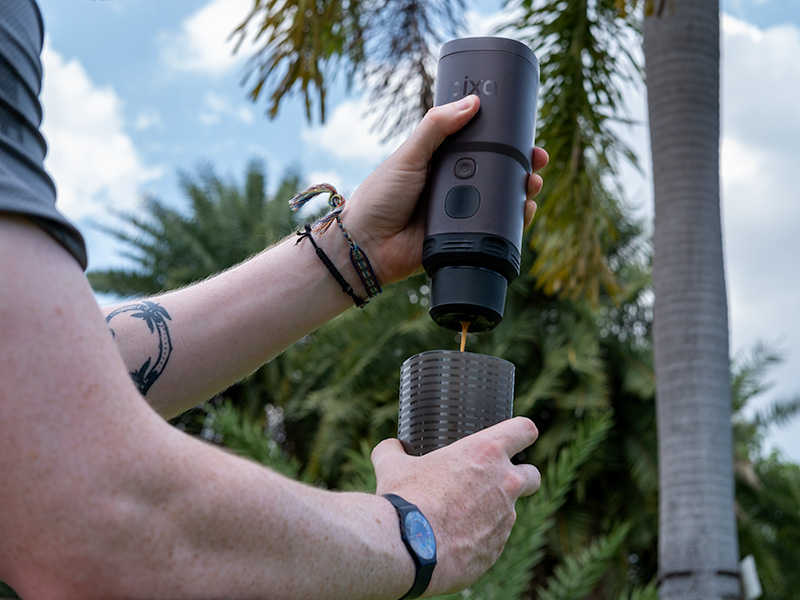
At $160, the Pixapresso is a legit portable espresso machine – not just a novelty for camping trips. With an unpressurized basket, temperature control, and pre-infusion, it can produce a shot that holds up next to plenty of home machines at three times the price. It takes patience to dial in and some extra equipment to get the very best results.
If you’d rather let it do its thing, the Pixapresso also works great if you just want to chuck a Nespresso pod in there. Though it’s a little more expensive than the OutIn Nano, which also does that perfectly well.
It meets you where you’re at. If you want to use a capsule or a scoop of pre-ground, then it works great. But you can also use it with a 16g dose and an unpressurized basket for serious espresso shots. We’ve enjoyed playing with the settings and working out how to get the best from this machine; read on for our unfiltered Wacaco Pixapresso review:
This article may contain affiliate/ compensated links. As an Amazon Associate, we earn from qualifying purchases at no additional cost to you. For more information please see our disclaimer here.

At a Glance: Wacaco Pixapresso Review
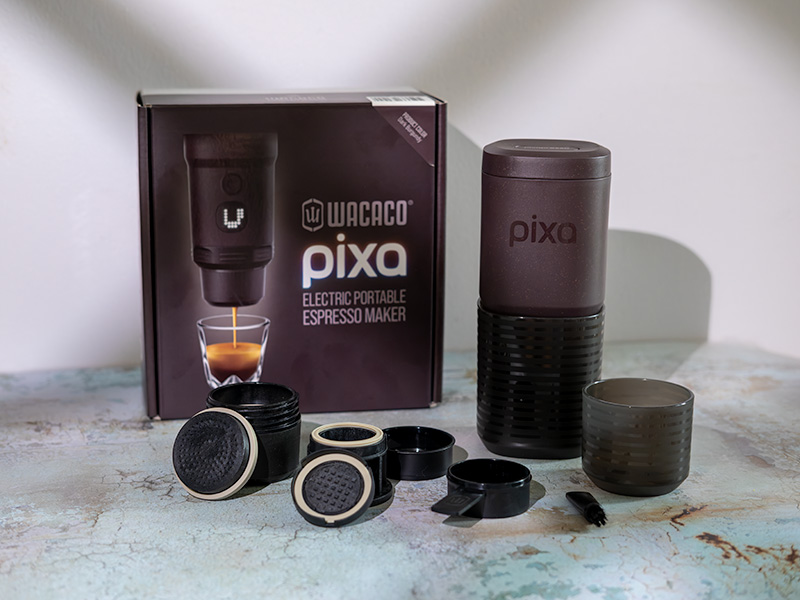
Verdict: For a budget-friendly price, the Pixapresso is the most complete handheld espresso machine we’ve tested. It has an unpressurized basket, three temperature settings, and pre-infusion that you can turn on or off. That kind of control is rare at this size, and you can taste the difference.
It also works beautifully for those looking for a simple espresso solution while traveling or camping. It is self-heating and works with Nespresso pods. Or you can keep the basket pressurized for using pre-ground coffee.
Bottom line: You can make the Pixapresso as hard or as easy to use as you want. That’s what really sets it apart. With time and effort, you can pull some really great shots, or just chuck the coffee in and get a quick espresso in a few minutes if that’s more your thing.

Pros
- Fantastic control
- 8 or 16g dose
- Pressurized, unpressurized or Nespresso pod
- Compact and light (755g)
- Leak-proof lid and cup
- Can heat the water
- Replaceable battery for increased lifespan

Cons
- The touchscreen is a little janky
- Accessories feel flimsy
- Heavier than competitors
- Slow to heat up

Our Ratings

Who It’s For (And Who It’s Not!)
✅ Buy the Wacaco Pixapresso if:
- You want real coffee, not just hot brown liquid, while travelling, camping, or at the office. No matter how you use the Pixapresso, you’ll get rich, flavorful coffee anywhere you take it.
- You already own a decent grinder and don’t mind spending a session or two dialling in. Using the 16g dose with the basket unpressurized gives you the best flavor, but it might take up to 15 shots to really dial in to your beans and preferences.
- You like having options: temperature, pre-infusion, ground coffee, or capsules. It’s incredible to have this much control when using a portable machine, so the Pixapresso is best suited to people who want to make the most of it.
❌ Skip it if:
- You’re looking for a lightweight solution for hiking. The Pixapresso is still lightweight, but the OutIn Nano is lighter. If every gram counts, then it’s not for you.
- You don’t want anything too complicated. It’s not super complicated to use the Pixapresso, but having more options means there’s a little more complexity than some may want.
- You’re worried about plastic. It’s designed to be a lightweight espresso machine, so as much of it as possible is made of BPA-free plastic. Sadly, that’s just the reality.

Key Features
1. 3 Temperature Settings
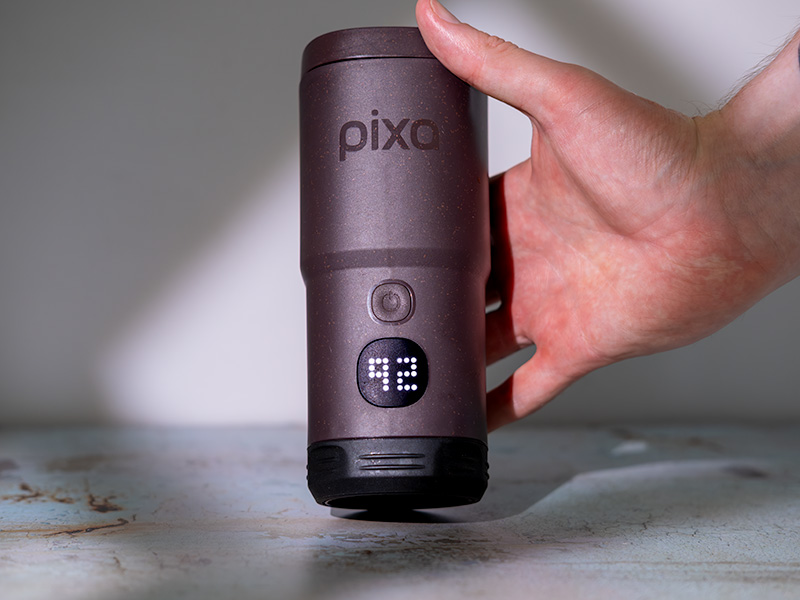
Most handheld espresso machines give you one water temperature and hope for the best. But the Pixapresso lets you pick between 190, 198, and 205°F (88, 92, and 96°C), so you can match the brew heat to your roast rather than the other way around.
You can use the higher temperatures for medium-roasted coffee or high-elevation, darker-roast single-origin beans. Or use the lower temperatures for regular dark roast. This flexibility helps you get the best flavor from a wider variety of coffee beans.
2. Pre-Infusion
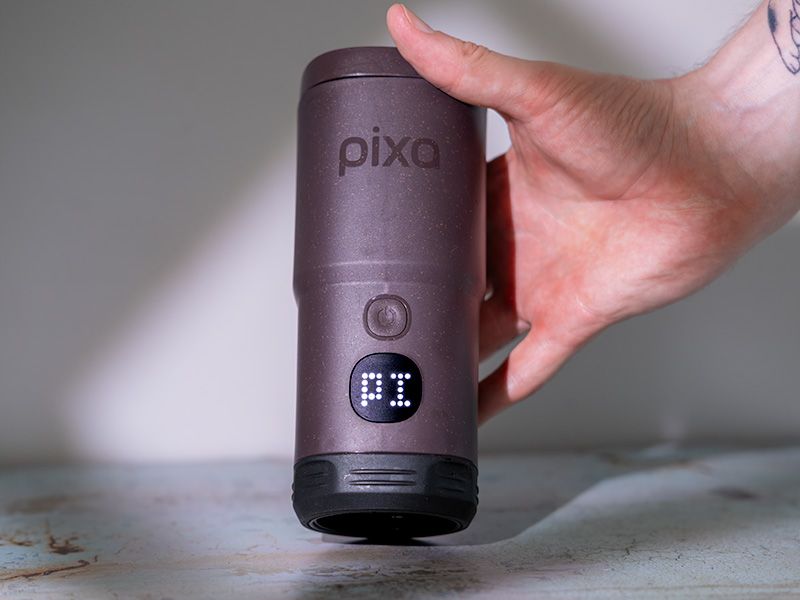
You can choose to brew directly or have a 5-second pre-infusion. This makes a huge difference to the flavor of your coffee. Pre-infusion soaks the grounds with a little water, allowing a lot of the CO2 that was trapped in the grounds to escape, meaning you get better flavors from extraction. Honestly, I don’t know why you’d turn it off.
The machine is set to “direct brew” (DB) as standard, so make sure to turn it to “PI” before you start brewing.
3. Adjustable Basket
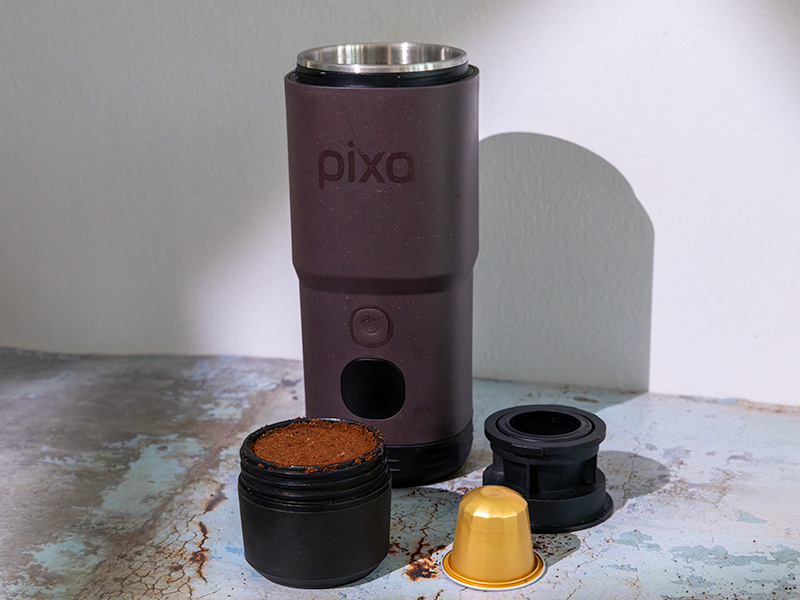
You can use Original Nespresso pods (or unbranded ones of the same design) in the specially designed basket. Or you can use either 8 or 16g of ground coffee in the pressurized basket. Having all 3 (easily swappable) options is excellent. Even though we only really use the 16g ground basket.
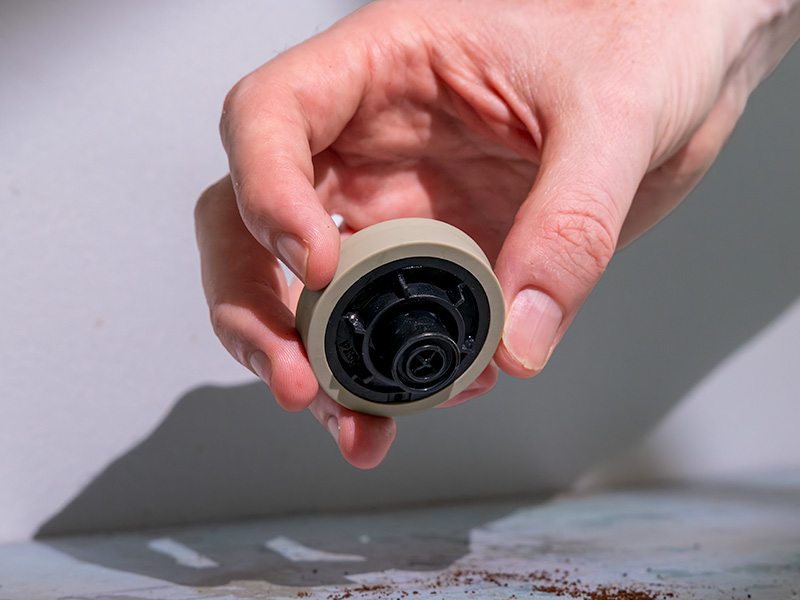
While not something Wacaco advertises, you can also take the spring out of the bottom of the ground coffee basket to change the pressurized basket into an unpressurized one. The result is better espresso flavor, though it’s tougher to dial in.
For Wacaco, this flexibility is a big step up from previous models like the Nanopresso and Minipresso that could only handle ground coffee OR pods (without a modular add-on).
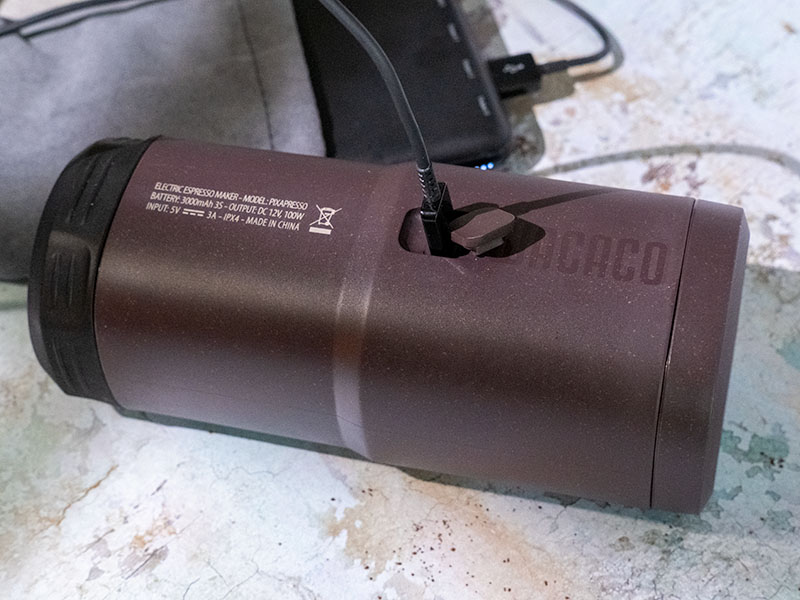
4. Battery and USB-C Charging
The 3000mAh battery gives you 4 espressos on one charge from room-temperature water or over 200 espressos using pre-heated water. It takes around 2.5 hours to fully charge using the same charger that you probably have for your phone. It’s also replaceable, so if the battery starts to die in a couple of years, you don’t need a whole new machine.
Brewing double espressos or Lungos will reduce the number of coffees you get on one charge, obviously. You won’t get more than 2 lungos on one charge. But it’s still impressive to get multiple espressos from cold water with a battery-operated machine – a game-changer if you’re hiking or traveling with it.

Is the Pixapresso easy to use?
The Pixapresso is simple to use, but it has a few options and modes, so it’s best to read the instructions first (boo).
By using the touchscreen combined with the “on/off” button, you can scroll through some options to change the size of the drink you’re making and the temperature of the water you want the Pixapresso to heat to. If you’re using pre-heated water, it will use whatever water is in the machine at whatever temperature you’ve put it in at.
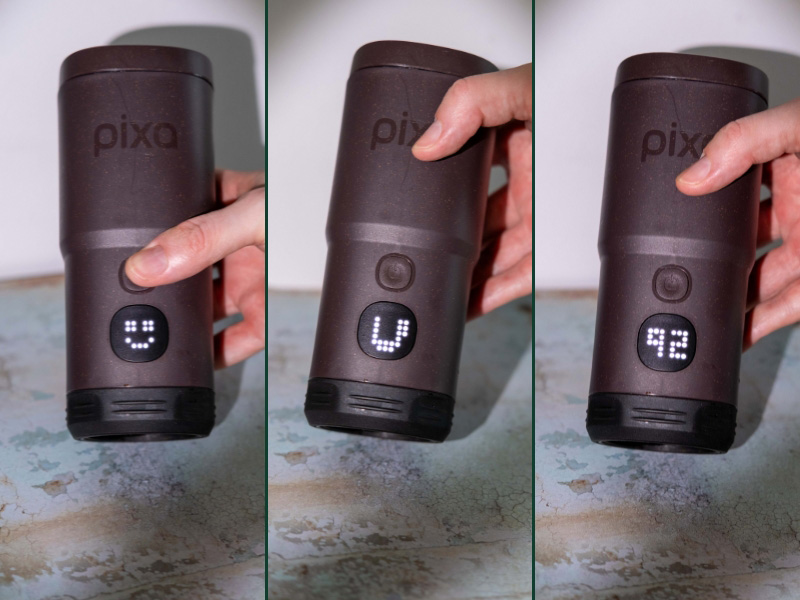
You can toggle the 5-second pre-infusion on or off in either mode, though. This is a really nice extra option for getting the best from your ground coffee. I have no idea why you’d have it turned off, but that’s the default setting, so make sure to switch it on.
Using a Nespresso pod is incredibly quick and simple, as it should be. Put the pod into the special filter basket, attach it to the Pixapresso, and add water. Push the button for coffee. Basically, as simple as using a normal counter-top pod machine.
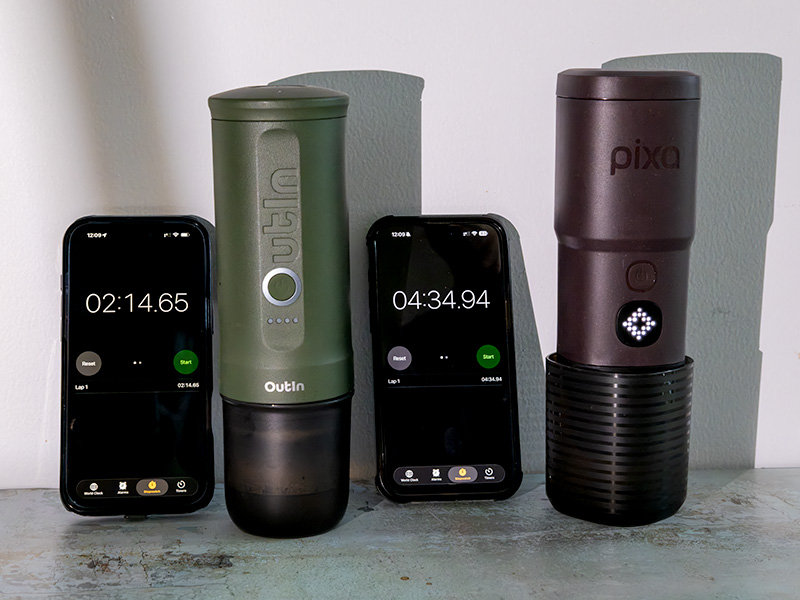
One thing that’s important to point out is that the Pixapresso is quite slow to heat up. From room temperature, it took 4 min 35s to heat 60ml of water to 92°C. That’s just over double the amount of time the OutIn Nano took to do the same thing. I like that it doesn’t just start brewing once it’s heated the water. You need to long-press the button to start extraction, so you can wander off and not worry about coming back to cold espresso.
Wacaco includes accessories to make using ground coffee nice and easy. There’s a dosing funnel and scoop that doubles as a tamper. The dosing funnel is narrower than we’d like, and the tamper feels very flimsy, but these are sort of necessary trade-offs to keep everything small and light.
Ultimately, the experience of using the Pixpresso is a pretty good one, whether you’re using pods, pre-ground coffee, or grinding your own. Overall, we’re really impressed.
How to make the Pixapresso basket unpressurized
This isn’t in the instructions from Wacaco, but it’s very easily done.
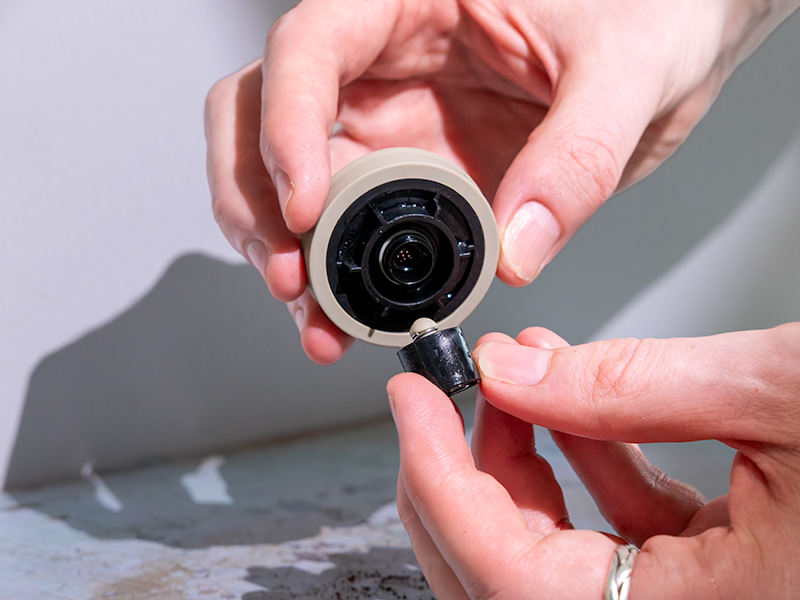
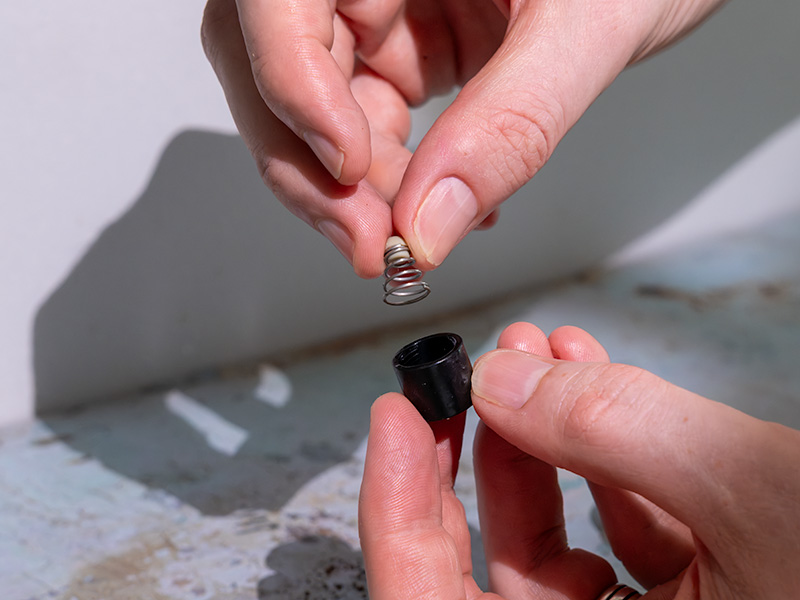
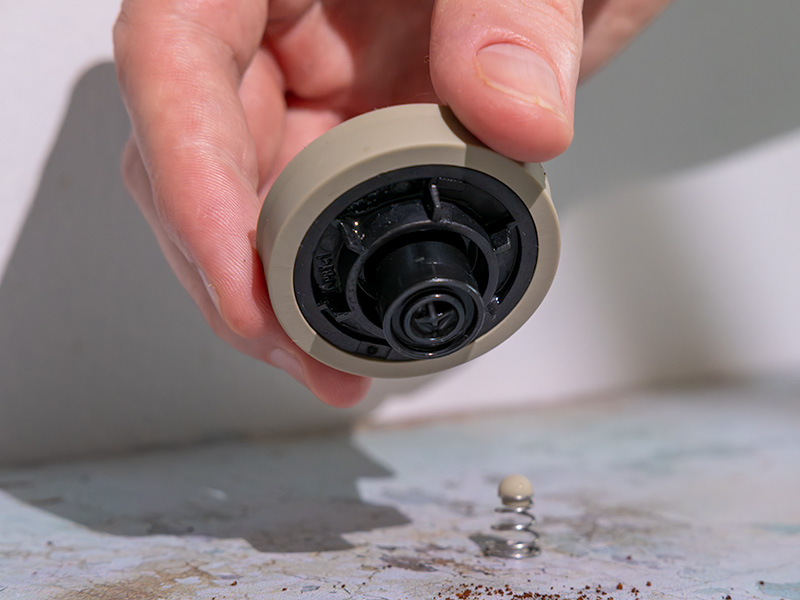
Simply unscrew the nozzle part at the base of the filter basket. Inside, you’ll find a little spring with a ball in it; this is what pressurizes the basket. Take that out, screw the nozzle bit back on, and you’re done.
Make sure you don’t lose that spring if you want the option to use it as a pressurized basket in the future.

How good is the Espresso?
The espresso from the Wacaco Pixapresso is as good as the work you put into it. Very impressive for a portable espresso maker.
There are 3 modes you can use to get espresso from the Pixapresso: pod, pressurized basket, and unpressurized basket. As you move through these modes, the difficulty goes up, as does the potential espresso quality. This is what you can realistically expect:
➡️ With pods: reliable and ok espresso – the easiest way to use the Pixapresso produces the most “meh” espresso. Hugely dependent on the quality of your pods, of course, but we got perfectly drinkable espresso out every time. Which I guess is the goal. If we were camping and wanted minimal-fuss caffeine, this would be our go-to.
➡️ Ground coffee and the pressurized basket: good but far from great – the pressurized basket evens out a lot of mistakes with grind size and tamping. It’s best for beginners using pre-ground coffee, but you can use it with freshly ground coffee too if you’re not looking for the best shots or to put in much effort. The espresso shots have decent depth and nice balance. But we couldn’t get the really nuanced flavors we wanted.
➡️ Ground coffee and the unpressurized basket: impressively good espresso is possible (emphasis on the “possible”) with a good grinder, preheating, and pre-infusion. We consistently pulled rich, full-bodied shots with a great balance of sweetness, acidity, and bitterness, and some delicate fruit notes with chocolate and nutty overtones. Which is a lot of words to say delicious. This did take around 10 shots to nail our workflow, so be prepared to work for it a little.
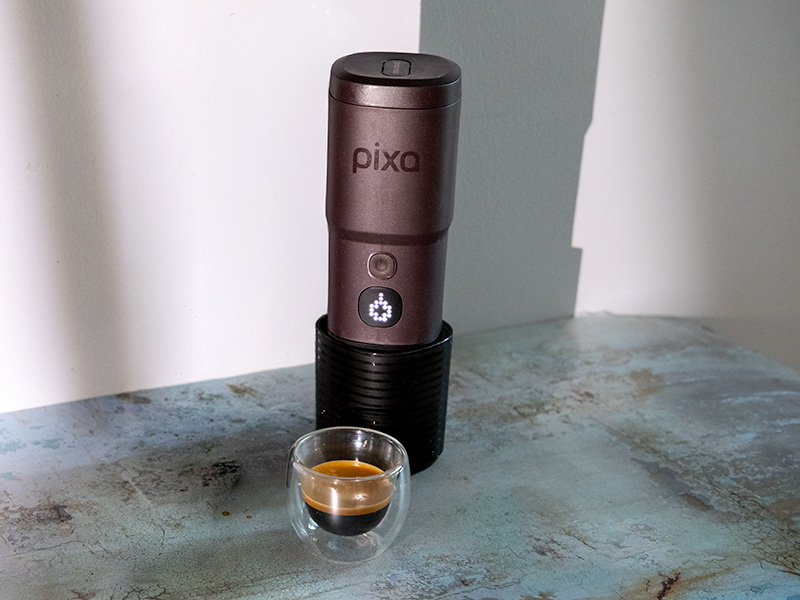
Having the choice of pods or grounds, 8g or 16g ground coffee, and pressurized or unpressurized from something this compact is great. We thought the Pixapresso did a solid job of all 3 things. You’re never going to confuse it with a proper portafilter machine on your counter, but then it’s not trying to compete with that either – it’s less than $200, after all. But it makes a fairly strong argument as an alternative to your home espresso machine as long as you’re not a several-espressos-a-day person, as well as a perfect travel option.
We got the best results from a medium-dark espresso blend. But with a finer grind setting and at max temperature, we did get some decent shots from a medium roast too.
If you want to get truly great espresso, though, you need extra accessories and a consistent workflow. Our non-negotiables are a scale to weigh out the 16g dose and a good grinder (we love our 1Zpresso J Ultra). But that also doubles the price of your espresso setup using the Pixapresso, and extra weight to carry.
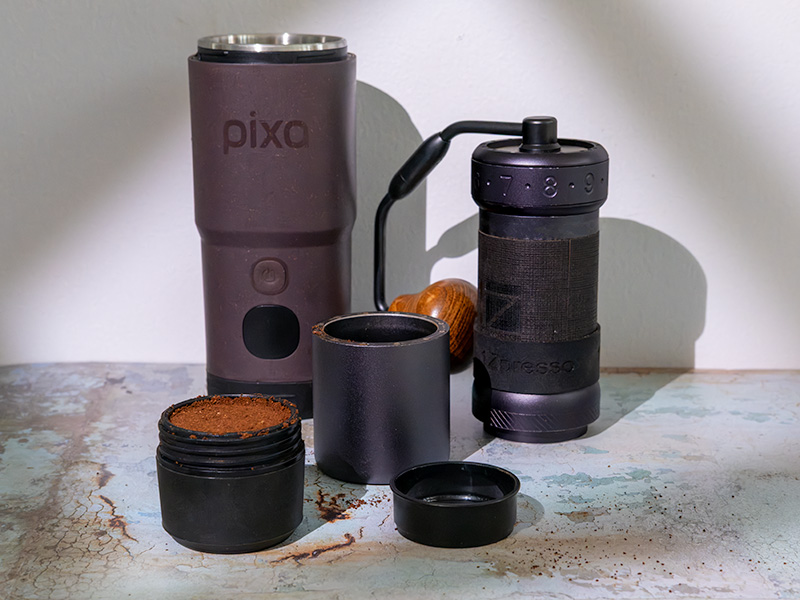
Our Wacaco Pixapresso Settings
These are our best settings with the unpressurized basket:

- Grind setting 1.6.7 on the 1Zpresso J Ultra grinder
- 16g dose
- Pre-infusion turned on
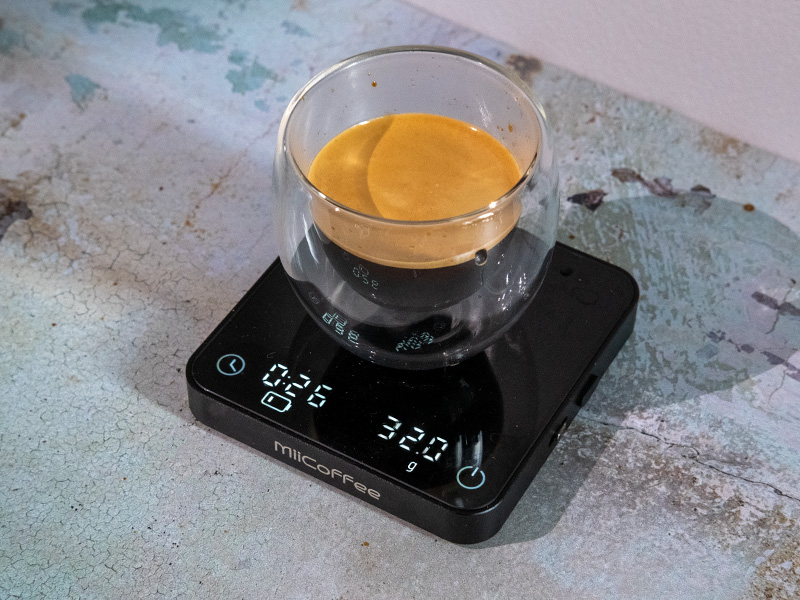
- 55 ml water straight off the boil (198°F / 92°C if using the Pixapresso to heat)
- We got 32g out in 26 seconds
We had to grind more coarsely than expected with our medium-dark espresso blend beans, but the resulting shot was very impressive. As well as the full-bodied, chocolate-and-nut style we expected at the bare minimum, there were some tropical fruit notes just breaking through. Overall great balance to the shot.
This did take us 10 or so shots to get right – mostly because we were grinding too fine and could hear the pump struggling to push the water through.
There are measuring lines inside the water chamber for adding water. But the double espresso line is 80ml and this is far too long for a double espresso for us. We were getting 50g or so out, and it was overextracted, bitter, and a little watery-tasting. Like a bad lungo. Using the espresso line at 55ml worked beautifully, though.
We never managed to jam the Pixapresso, unlike when we dialed in the OutIn Nano – another plus point for the Pixapresso.

Should you use Pods, Pre-ground, or Whole Beans?
All 3 work well, but how much effort do you want to put in?
The 3 options for the Pixapresso in order of difficulty are:
- Coffee pods
- Pressurized basket
- Unpressurized basket
For best results, you need to use a 16g dose with the basket unpressurized. This gives you the least room for error and will take you quite a few shots to get right. Once you’re dialed in, though, as long as you don’t change beans, then you can build an easily replicable workflow, and it’ll become simple.
The Pixapresso has an LED screen to help you scroll through the settings, and then you use the on/off button to change them. There isn’t a lot to choose from: temperature, pre-infusion, using pre-heated water or heating the water, and then what size of coffee you want if you’re heating the water. You’ll want to read the instructions, though – just a brief flick through so you know how to get the settings you want.
The scoop/tamper and dosing funnel accessories do make it a little easier to use. We freshly grind our coffee to avoid the staleness of pre-ground, so having a dosing funnel included is a big plus. Although we’d prefer it to be a little wider, it still works 95% of the time to stop me from spilling coffee everywhere.

Design and Build Quality Review
The Looks
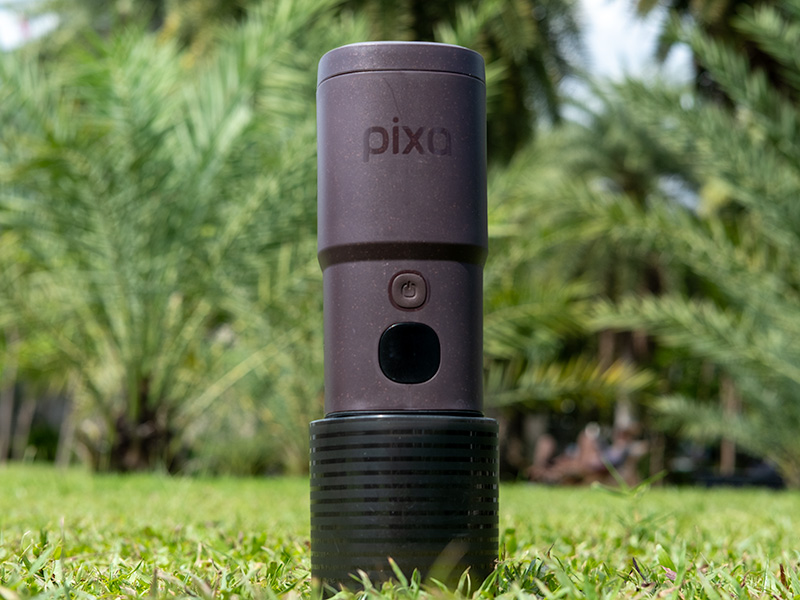
We have the “Dark Burgundy” version, which we really like. It also comes in “Tuscan Red” for those who like a brighter color in their coffee machines, and the essential “Olive Green” color that all outdoorsy products apparently must have.
The sort of square-ish cylinder design feels like it takes up more space than it actually does, but it also allows the espresso maker to perch on the included cup so you can leave it to extract without holding it or buying an extra stand (looking at you, OutIn 👀).
The brewing basket fits inside the water tank for compact travel. Though if you’re taking both the NS basket and the ground coffee basket, then you’ll need a little bag for one of them.
The screen works well and looks nice. The little animations are kinda fun, and it’s nice to see the temperature rising on the screen as it heats up to get an idea of how much longer you need to wait for coffee.
With the cup attached its only 7.1″ tall and 2.9″ in diameter – really compact.
The Build
The Pixapresso feels solid to me. I’m pretty sure I could drop it a few times, and it would be fine. I’m not so confident that I’m willing to test this theory, however. We have managed to get a few scratches on the outside from chucking it into our bag a few times. Thankfully, the finish is sort of speckled anyway, so they don’t ruin the look too much.
Speaking of chucking it in backpacks, a couple of nice choices make it much less likely to leak water/coffee on your stuff than some other travel espresso machines:
The water tank lid screws on tightly, and there is a rubber lip around the base that acts as a seal when the cup is pushed on. Much appreciated by someone who already has coffee stains on most things.
My only real issue with the build quality is that the accessories feel flimsy. The scoop/tamper handle feels very breakable; the dosing funnel does too. But then they have to be flimsy and light, or you wouldn’t carry them everywhere.
It weighs 26.6oz (755g), which isn’t super light. But it’s got batteries and a pump in there, so there’s not a lot they can do about that. It’s a little heavier than its main competitor, but by about the weight of a bag of chips, so nothing serious.
A huge plus: the batteries are replaceable. So if in 3-4 years you find you’re only getting 1 espresso per charge, you don’t need a whole new machine, just a new battery.

Cleaning and Maintenance Review
Really well thought-out cleaning, even if it took me a while to realise.
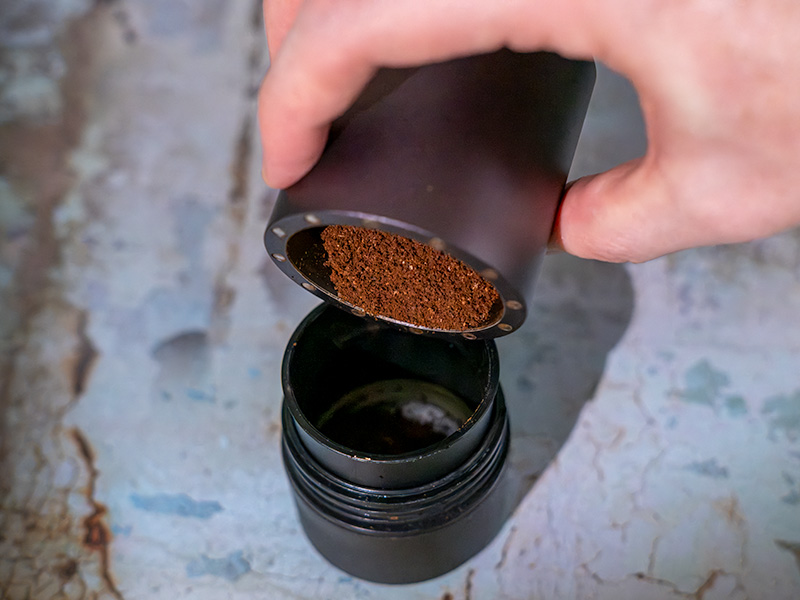
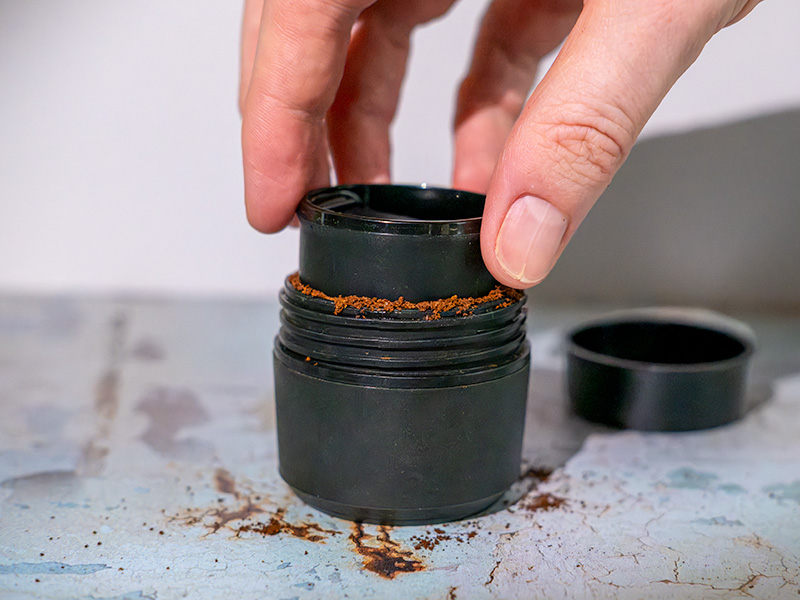
It took me an embarrassing length of time to realise I could just push the spent pucks out from the bottom. The adjustable basket size has, by luck or design, made cleaning super easy. Before I realised this, I was getting very annoyed trying to bash the used pucks into our knock box.
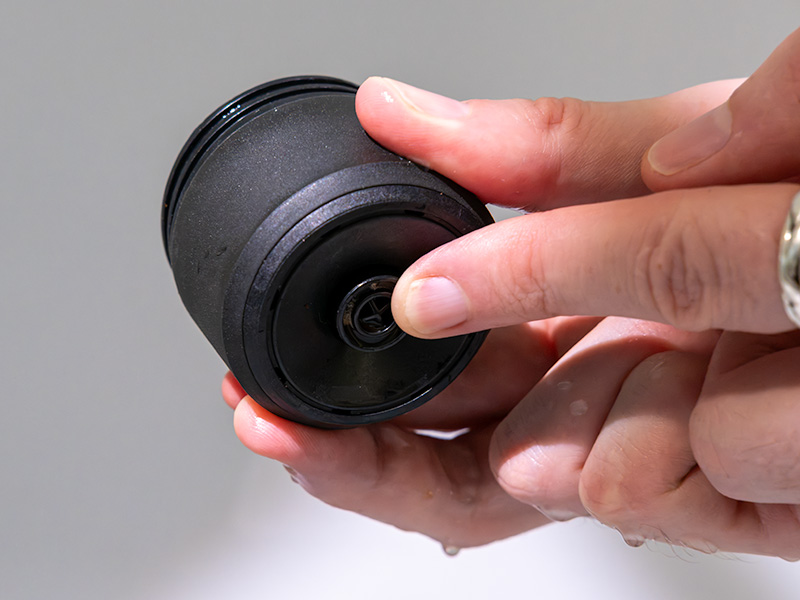
Using pods is great for minimizing cleaning. Pod goes in, espresso shot comes out, pod pops out, next pod goes in. Ideal for knocking out a few espressos on a hike.
Your cleaning routine is going to look something like this:
Daily: Pull out the spent pod and bin/recycle it, or push the spent puck out and rinse the basket.
Weekly: Deep-clean your filter basket, especially if you like really dark roast coffee. You can probably get away with not doing this for a few weeks on the road, depending on how frequently you use it.
Periodic: The Pixapresso could need to be descaled, though Wacaco claims that if you use mineral water for your coffee, it will be fine. We shall see.
It’s really not a lot to do if we’re being honest.

The Competition
The main competition to the Pixapresso is the OutIn. And they have 2 models that stand up well:
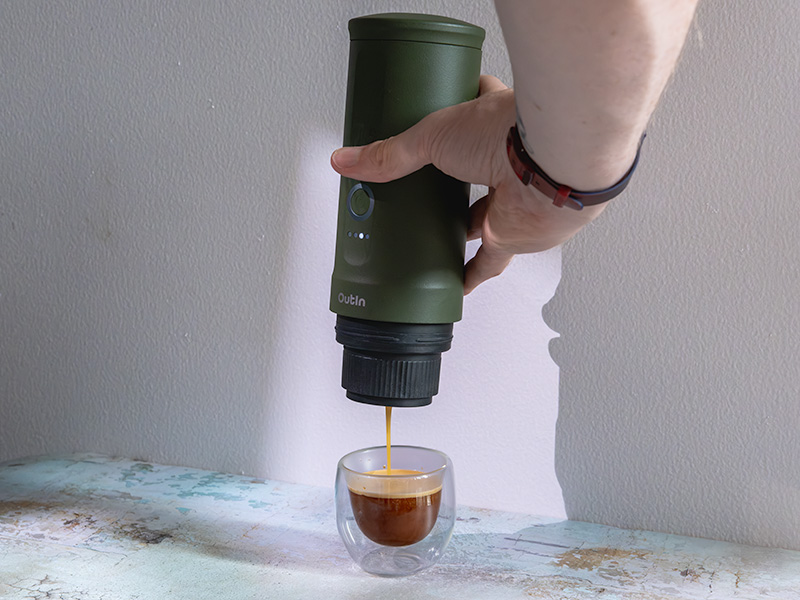
OutIn Nano
- ☕️ Espresso Quality: 7.5/10
- 👍🏼 Ease of Use: 7/10
- ✈️ Portability: 9/10
- 💸 Value for Money: 8/10
- 🏆 Overall Rating: 8/10

The OutIn Nano aims to do basically the same thing as the Pixapresso, but it doesn’t perform quite as well.
It’s $10 cheaper, but there are no temperature choices, no pre-infusion, no different brewing choices, and only an 8g basket as standard.
If you only plan to use Nespresso pods with your machine, then the Nano is the better choice. Don’t make life more complex than it needs to be and save yourself $10, a couple of minutes of heat-up time, and 3 ounces of weight.
For everyone else, the Pixapresso is the better choice. You can get a special Basket Plus add-on for the Nano to get your 16g dose, but that makes it more expensive than the Pixapresso, and it’s still not better at brewing espresso.
Psst… We think you’ll like our in-depth comparison of the OutIn Nano and the Wacaco Pixapresso
OutIn Mino
The Mino sits above both machines on price and positions itself as the more premium electric option in OutIn’s range, with a larger stock basket than the Nano straight out of the box.
We’d still point most people towards the Pixapresso first. You’re paying less, you get proper temperature control and pre-infusion, and the coffee quality ceiling is just as high once you’ve dialled it in. The Mino only really makes sense if convenience matters more to you than value for money.
Wacaco Picopresso

- ☕️ Espresso Quality: 9.5/10
- 👍🏼 Ease of Use: 7/10
- ✈️ Portability: 8.5/10
- 💸 Value for Money: 9/10
- 🏆 Overall Rating: 9/10
The Picopresso is a totally different animal to the Pixapresso, despite the confusingly similar name.
For starters, it’s not a battery-powered espresso maker. So you need a separate way of heating your water, which might automatically rule it out for you, depending on how you plan to use it.
That said, the potential espresso quality is higher. It has a naked portafilter with a wide 52mm commercial filter basket that can hold up to an 18g dose, meaning high-quality double shots are achievable, with great depth of flavor.
You just have to be willing to put in the work – including generating the pressure yourself.
For a solid yet compact at-home setup for anyone willing to put in the work, the Picopresso is the better choice. But for flexibility and use while traveling, the Pixapresso takes the W for us.
The Verdict
The Pixapresso is proof that a handheld espresso machine doesn’t have to choose between being portable and being good.
Probably the best thing about the Pixapresso is that it meets you where you are. Pods, pre-ground coffee, fresh ground on easy mode, or more demanding fresh ground coffee combined with an unpressurized basket are all rewarded in the cup.
It’s not quite an “all things to all people” machine, but it’s really quite close.
Compared to the OutIn Nano, it’s a little slow. But I’m struggling to think of a time when I’d be out and about brewing a few espressos and really concerned about an extra 10 mins of heating time.
We found that with the unpressurized basket, we could get a genuinely good espresso shot that you’d never think came from a portable machine. It performed much, much better than we expected when we started testing for our Wacaco Pixapresso review. Which is either a sign that our sta
Unless you’re solely looking to use pods with your portable espresso machine, the Pixapresso is the best choice for those looking for battery-powered heating and extraction.
Convinced that the Pixapresso is the one for you?